Category Archives: Guide

bike value guide

Bike Value Guide: A Comprehensive Overview (Updated March 31, 2026)

Navigating the bicycle market requires understanding depreciation, current trends, and component impacts; recent releases like the Hope HB912 and Teewing Flux
are influencing values.
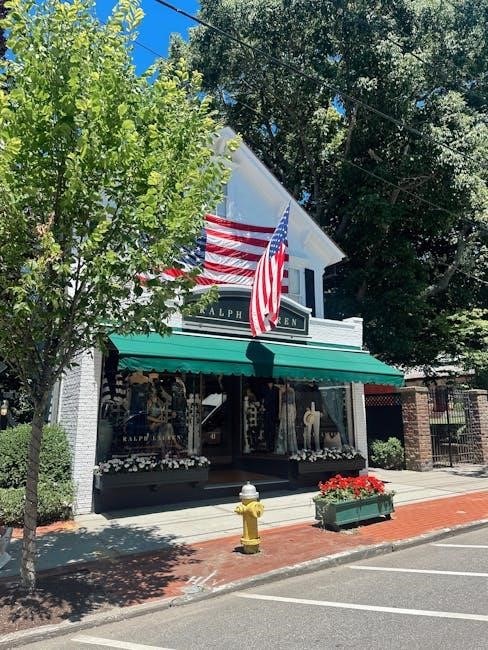
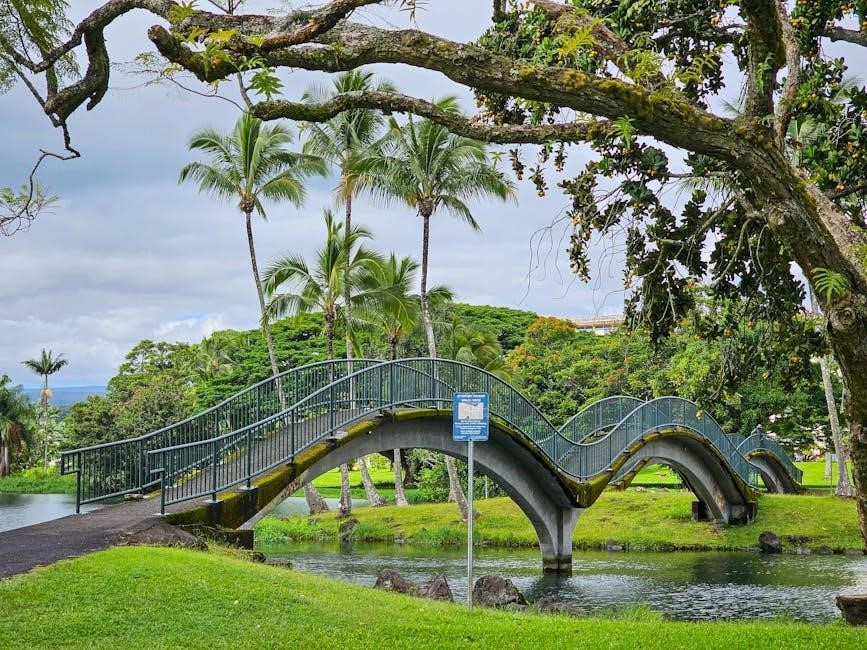
The inaugural BC Bike Fest, May 29-31, 2026, will also shape regional pricing, alongside the growing adoption of 32-inch wheels.

Understanding Bike Depreciation

Bike depreciation, much like automobiles, is a significant factor in resale value. A startling statistic reveals that most bikes can lose approximately 20% of their initial value within the first year alone. This initial drop is often the steepest, stemming from the simple fact that it’s no longer “new.”

Several elements contribute to this decline. The introduction of newer models, like the Hope HB912 and Teewing Flux, immediately impacts the perceived value of older bikes. Technological advancements and design changes render previous generations less desirable. Furthermore, general wear and tear, even with diligent maintenance, contribute to depreciation.

However, depreciation isn’t always linear. Certain brands and high-end components retain value better than others. Limited edition models or those associated with successful racers, like Evie Richards, may experience slower depreciation rates. Understanding these nuances is crucial for both buyers and sellers in the current market, especially with events like BC Bike Fest influencing demand.

The Impact of Time on Bike Value

Time is a relentless force in diminishing a bicycle’s monetary worth. Beyond the initial 20% depreciation experienced in the first year, subsequent years see a gradual decline, though the rate slows. Bikes over five years old often represent significantly lower value compared to their original price, unless exceptionally well-maintained or featuring highly sought-after components.

The cycling industry’s rapid innovation accelerates this process. New wheel sizes, like the emerging 32-inch standard, can quickly render older bikes feel outdated, impacting resale potential. Releases of bikes like the Teewing Flux and Hope HB912 further contribute to this effect, shifting consumer preferences.

Seasonal factors also play a role. Demand typically peaks in spring and summer, offering better selling opportunities. Conversely, attempting to sell during the off-season may necessitate lower prices. Events such as BC Bike Fest can create localized spikes in demand, temporarily boosting values within the region.

Factors Influencing Bike Resale Value

Several key elements dictate a bicycle’s resale price beyond age and initial cost. A bike’s overall condition is paramount; meticulous maintenance and the absence of significant damage command higher values. Detailed maintenance records are invaluable, demonstrating responsible ownership and proactive care;

Component quality significantly impacts value. Bikes equipped with premium groupsets (shifters, derailleurs, brakes) and wheelsets retain more worth. The frame material – carbon fiber, aluminum, or steel – also plays a role, with carbon generally fetching higher prices.

Market trends, as seen with the rise of 32-inch wheels, and new bike releases like the Hope HB912 and Teewing Flux, influence demand. Regional events, such as BC Bike Fest, can temporarily inflate prices within the event’s vicinity. Finally, a bike’s aesthetic appeal and any included accessories contribute to its overall desirability.

Types of Bikes and Their Value Trends

Mountain, road, and electric bikes each exhibit unique depreciation curves; market forces, like new releases (Hope HB912, Teewing Flux), and event influence (BC Bike Fest)
drive value fluctuations.

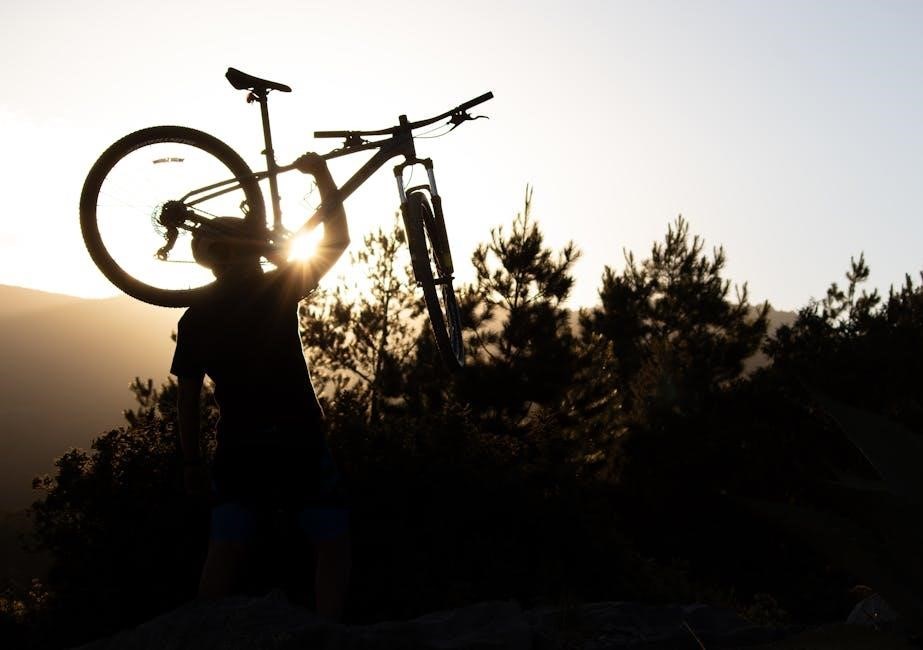
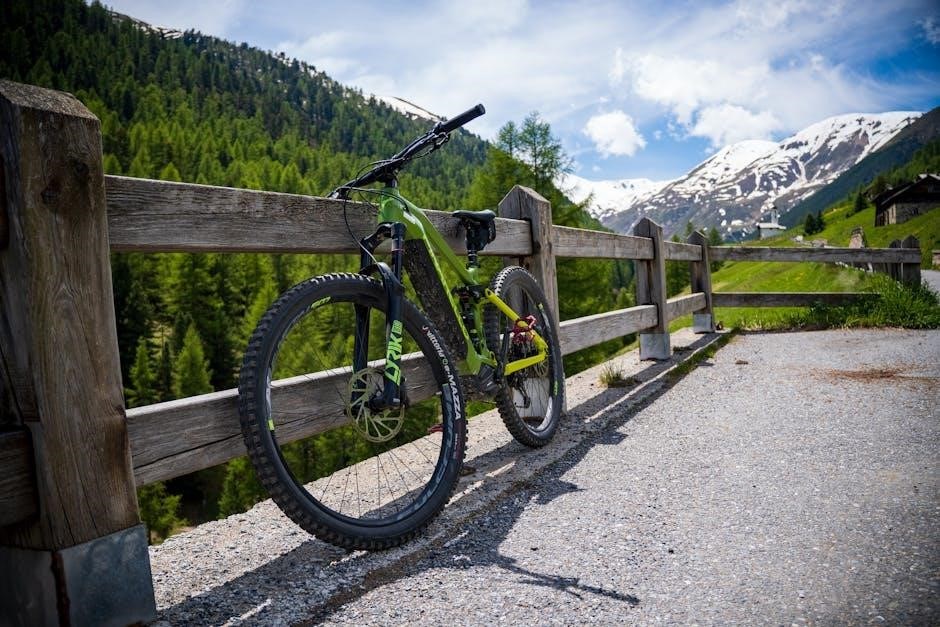
Mountain Bike Value Guide

Mountain bike valuation is heavily influenced by suspension type and component specifications. The market currently sees a dynamic shift with the potential rise of 32-inch wheels, which could impact older models. Full suspension bikes generally retain more value than hardtails due to their versatility and advanced technology, but this is also dependent on the groupset and overall condition.

Recent industry events, such as the unveiling of the Hope HB912 trail bike and the Teewing Flux enduro eMTB at the Core Bike Show, are setting new benchmarks for performance and pricing. Bikes used in competitive events, or those mirroring designs seen with riders like Evie Richards, may experience increased demand. The upcoming BC Bike Fest (May 29-31, 2026) will likely influence regional pricing and demand for trail and enduro-focused mountain bikes. Understanding these trends is crucial for both buyers and sellers.

Depreciation remains a significant factor, with bikes potentially losing up to 20% of their value in the first year. Regular maintenance and meticulous record-keeping are vital for maximizing resale value.

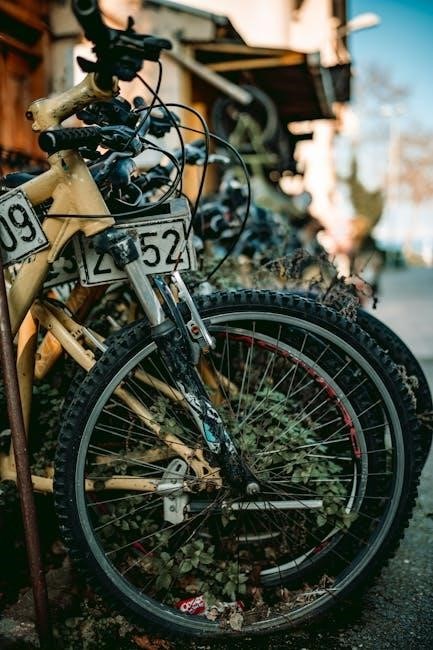
Hardtail Mountain Bike Valuation

Hardtail mountain bike value is particularly sensitive to age and component level. While generally more affordable than full-suspension models, depreciation can be significant, potentially reaching 20% in the first year. The emergence of new technologies, like the potential shift towards 32-inch wheels, can quickly diminish the appeal – and therefore value – of older hardtails.

Bikes featuring components showcased at events like the Core Bike Show, even if not directly incorporated, benefit from the increased market awareness of current standards. The overall condition is paramount; a well-maintained hardtail with documented service history will command a higher price. The type of riding the bike was used for also matters – bikes used for aggressive trail riding will show more wear and tear.

Regional events, such as the BC Bike Fest (May 29-31, 2026), can create localized demand, potentially boosting prices in areas with strong riding communities. However, the basic design of a hardtail means it’s more susceptible to becoming outdated.

Full Suspension Mountain Bike Valuation

Full suspension mountain bike valuation is complex, heavily influenced by travel, linkage design, and component specification. These bikes generally hold their value better than hardtails, but still experience depreciation, around 15-20% initially. New bike releases, like the Hope HB912 and Teewing Flux, immediately impact the resale market for comparable models.

The condition of the suspension – shocks and forks – is critical. Servicing records are essential, as neglected suspension can significantly reduce value. Bikes used for demanding enduro or downhill riding will depreciate faster due to increased wear and tear. The rise of 32-inch wheels may affect older models, though full-suspension bikes are less immediately impacted.

Events like the BC Bike Fest (May 29-31, 2026) can create localized demand, but full-suspension bikes are less susceptible to regional fluctuations than hardtails. A well-maintained bike with upgraded components will always fetch a premium.

Road Bike Value Guide

Road bike valuation hinges on frame material, groupset level, and wheel quality. Depreciation is significant, often mirroring motorcycle losses – up to 20% in the first year. Entry-level models depreciate rapidly, while high-end bikes retain value better, particularly those with sought-after components.

The introduction of new models, such as those showcased at events like the Core Bike Show, immediately impacts resale prices. A bike’s condition is paramount; meticulous maintenance records are crucial. Bikes used in competitive racing or frequent long-distance rides will show more wear.

Regional events, like the BC Bike Fest, have limited direct impact on road bike values, but overall market confidence plays a role. The emergence of new technologies and wheel sizes doesn’t drastically affect road bike values as quickly as mountain bikes.

Entry-Level Road Bike Pricing

Entry-level road bikes typically range from $800 to $1,500 new, but experience substantial depreciation. Expect a 30-50% loss in value within the first year, influenced by usage and condition. These bikes often feature aluminum frames and basic Shimano or Sora groupsets. Resale values quickly fall to $400-$800, depending on age and maintenance.

Factors impacting price include cosmetic damage, worn tires, and brake pad wear. Bikes with documented service history command slightly higher prices. The market is flooded with used entry-level models, creating strong downward pressure on pricing. Newer models with minor upgrades, like improved wheels, can fetch a premium.

Events like the BC Bike Fest don’t directly influence this segment, but overall cycling enthusiasm can indirectly boost demand. Careful cleaning and presentation are vital to maximizing resale value.

High-End Road Bike Valuation

High-end road bikes, costing upwards of $5,000 new, retain value better than entry-level models, though depreciation still occurs. Expect a 20-30% loss in the first year, leveling off thereafter. Carbon fiber frames, Shimano Dura-Ace or SRAM Red groupsets, and carbon wheelsets are key value drivers. Resale prices typically range from $3,500 to $6,000, contingent on condition and age.

Meticulous maintenance records are crucial; proof of professional servicing significantly increases appeal. Cosmetic flaws, even minor scratches, can detract from value. Component upgrades, such as power meters or aerodynamic handlebars, can justify a higher asking price. The introduction of new bike models, like those showcased at Core Bike Show, can influence pricing.

Demand for high-end bikes remains relatively stable, but market fluctuations exist. A well-maintained, recent-year model will always command a premium.

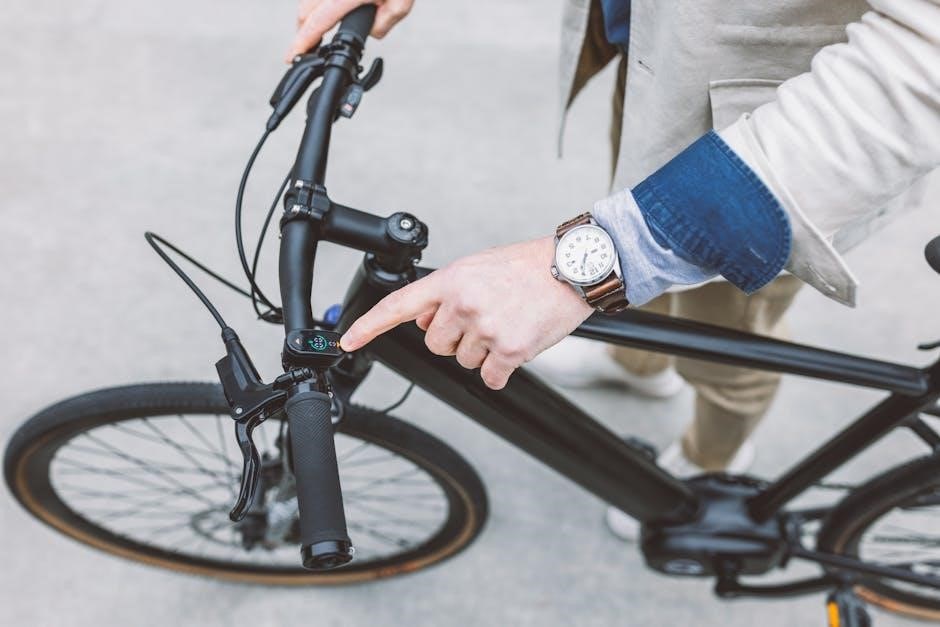
Electric Bike (e-Bike) Value Guide

e-Bike valuation is complex, heavily influenced by battery health and motor type. Unlike traditional bikes, battery degradation significantly impacts resale value; expect a noticeable decrease after three years or 500 charge cycles. Initial depreciation is steeper, around 20-30% in the first year, due to rapid technological advancements.

Mid-drive motors (Bosch, Shimano) generally hold value better than hub-drive systems. Full-suspension e-MTBs, like the Teewing Flux, command higher prices than rigid or front-suspension models. Battery capacity, motor wattage, and range are key selling points.

A well-maintained e-bike with documented service history will fetch a better price. Consider the original purchase price and comparable models currently available. The growing popularity of e-bikes supports relatively strong resale values, but condition remains paramount.

e-MTB Value Considerations

e-MTB valuation hinges on motor system, suspension quality, and battery condition. Full-suspension models, particularly those from established brands, retain value better than hardtails. The Teewing Flux, a recent enduro eMTB release, demonstrates the impact of new technology on pricing expectations.

Battery health is critical; potential buyers scrutinize charge cycles and remaining capacity. Expect a significant value drop with noticeable degradation. Motor type—Bosch, Shimano, Yamaha—influences resale, with established systems commanding premiums.

Trail bike geometry and component spec (brakes, drivetrain) also matter. Bikes used for aggressive riding or in harsh conditions will depreciate faster. Documented maintenance records, especially battery servicing, are essential. The rise of 32-inch wheels may subtly impact older models lacking compatibility.

e-Road Bike Value Considerations

e-Road bike valuation is a nuanced process, heavily influenced by motor integration and overall weight. Unlike traditional road bikes, battery capacity and motor system (Shimano, Mahle) are primary value drivers. Newer models with sleeker integration, like those potentially emerging following industry trends observed at shows like Core Bike, command higher resale prices.

Condition of the battery is paramount; diminished range significantly impacts value. Frame material—carbon fiber being preferred—and groupset level (Shimano Ultegra or Dura-Ace) play crucial roles, mirroring traditional road bike valuation.

Mileage and documented charging cycles are important factors for potential buyers. Expect faster depreciation on bikes used extensively in challenging terrain. The impact of events like BC Bike Fest, while primarily mountain bike focused, can indirectly influence overall cycling market confidence and thus, e-road bike values.

Key Components Affecting Bike Value

Component quality dramatically influences resale value; frame material, groupset functionality, and wheelset performance are critical. Upgrades and maintenance records significantly impact perceived worth and market appeal.

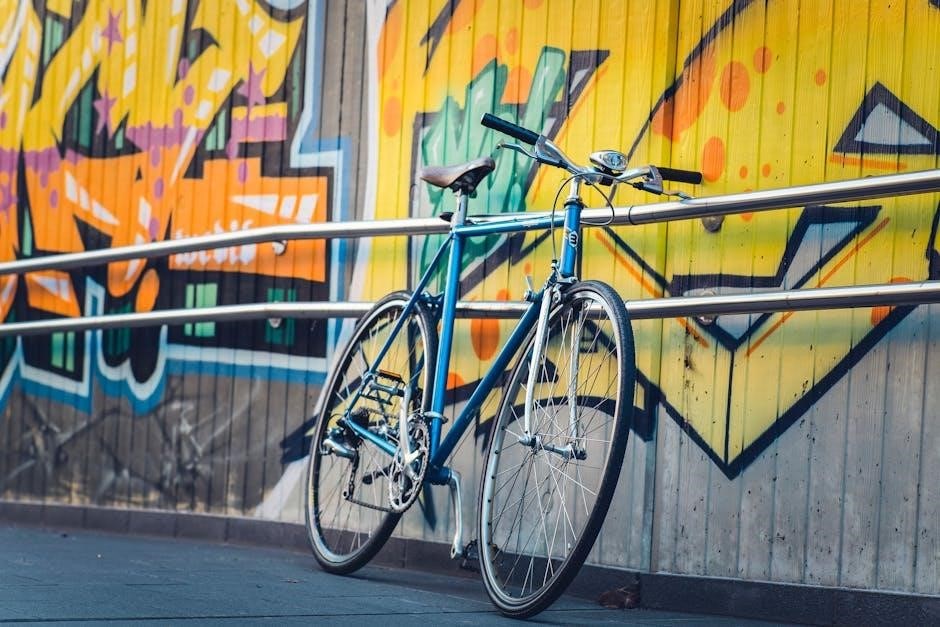
Frame Material and Value

The frame is the core of any bicycle, and its material profoundly impacts value. Traditionally, steel frames were common, offering durability and a comfortable ride, but they’ve largely given way to lighter alternatives. Aluminum alloy frames represent a sweet spot for many riders, balancing affordability, weight, and stiffness – making them prevalent in mid-range bikes.

Carbon fiber frames command a premium due to their exceptional strength-to-weight ratio and ability to be molded into aerodynamic shapes. High-end bikes almost exclusively feature carbon fiber, and a well-maintained carbon frame retains significant value. Titanium, while less common, is prized for its corrosion resistance, ride quality, and longevity, often holding its value exceptionally well.

Frame condition is paramount. Dents, cracks, or repairs significantly diminish value. Even minor cosmetic damage can affect resale price. Prospective buyers scrutinize frames for signs of stress or previous accidents; A pristine frame, regardless of material, will always fetch a higher price than one with visible wear and tear.

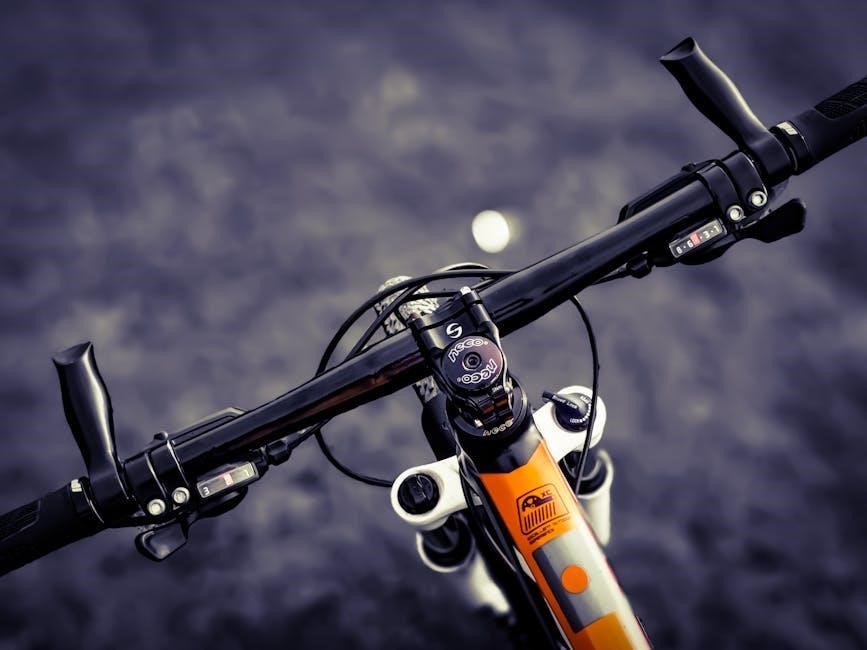
Groupset (Shifters, Derailleurs, Brakes) Impact

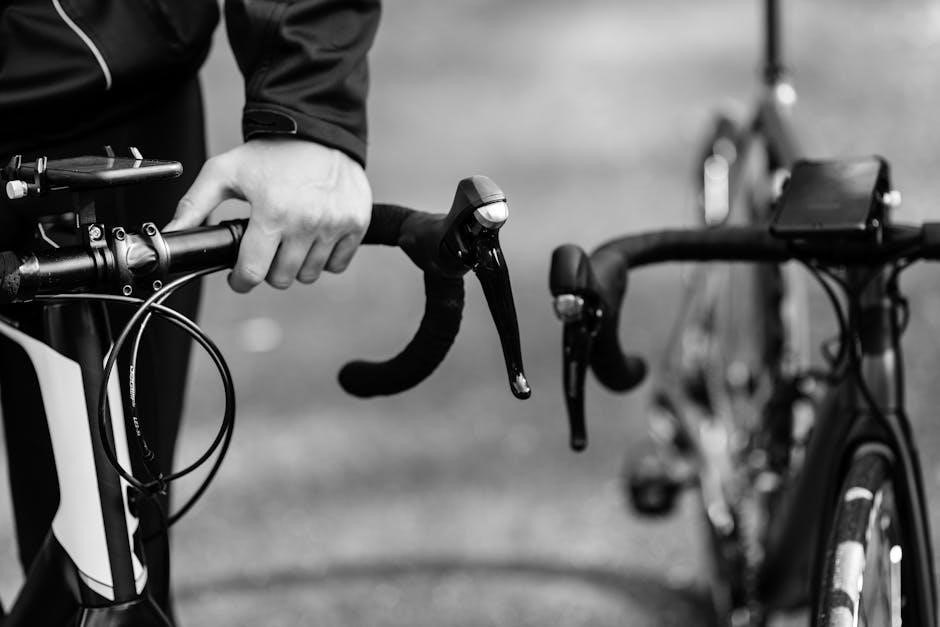
A bike’s groupset – encompassing shifters, derailleurs, and brakes – is a major determinant of its value. Shimano, SRAM, and Campagnolo are the dominant manufacturers, each offering tiers of components ranging from entry-level to professional-grade. Higher-tier groupsets deliver smoother, more precise shifting, improved braking power, and reduced weight.

Groupsets are often the first upgrade cyclists make, so a bike equipped with a higher-level groupset will command a higher resale price. For example, a bike with Shimano Ultegra or SRAM Force will be worth considerably more than one with Shimano Claris or SRAM Apex. The condition of the groupset is crucial; worn cables, stretched chains, or malfunctioning brakes detract from value.

Matching components within a groupset is also important. A mix-and-match setup can signal neglect or cost-cutting, potentially lowering the bike’s perceived value. Regularly servicing the groupset, replacing worn parts, and ensuring proper adjustment are essential for maintaining its worth.

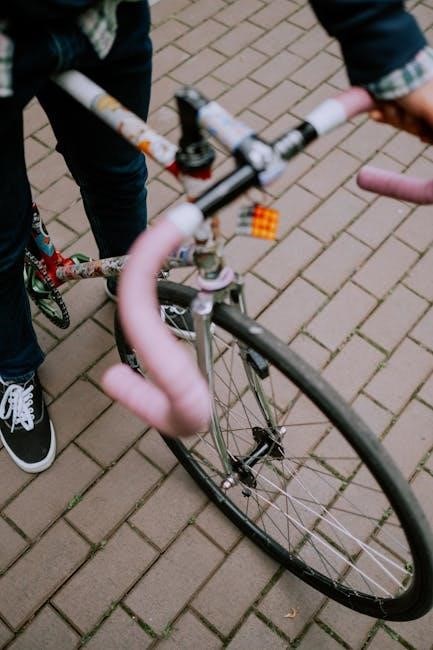
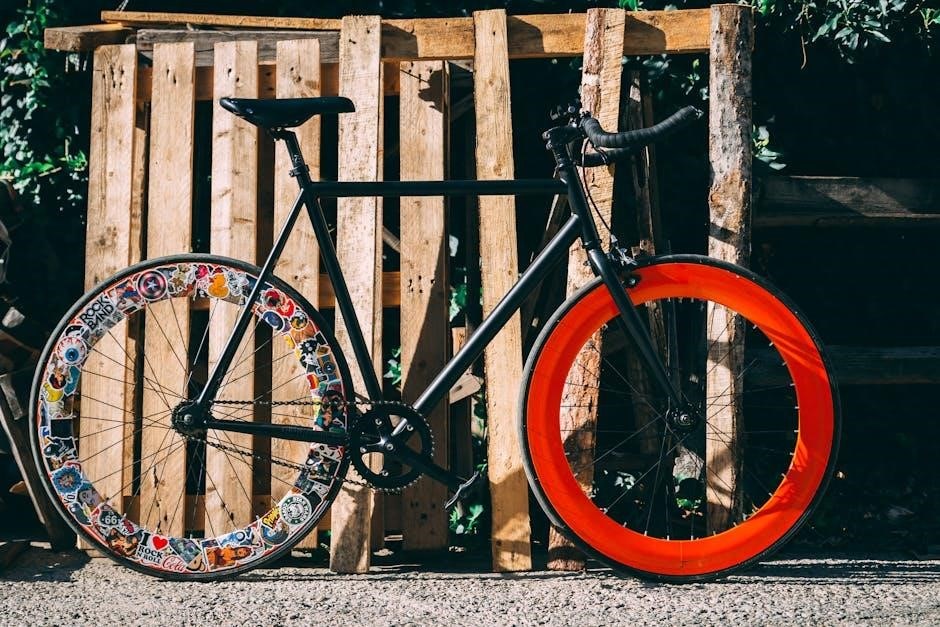
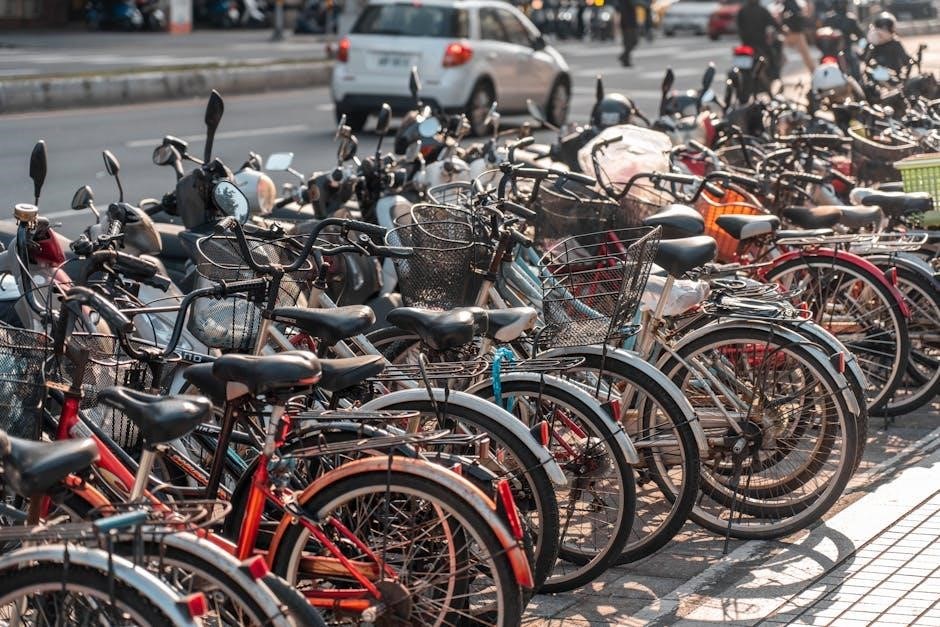
Wheelset and Tire Value Contribution

The wheelset is often considered the single most impactful upgrade for improving a bike’s performance, and consequently, its value. Lightweight alloy or carbon fiber wheelsets significantly enhance acceleration, climbing ability, and overall ride quality. A high-quality wheelset can add a substantial premium to a bike’s resale price.

Rim depth and material play key roles. Deeper-section carbon wheels are favored for aerodynamics, while shallower rims offer greater versatility. Hub quality is also critical, influencing smoothness and durability. Tires are equally important; newer, high-performance tires in good condition demonstrate care and enhance appeal.

Worn or damaged wheels drastically reduce value. Dents, cracks, or excessive wear necessitate repair or replacement, impacting the final price. Similarly, tires with significant tread wear or sidewall damage detract from the bike’s overall condition. Maintaining proper tire pressure and inspecting wheels regularly are vital for preserving their worth.

Condition and Maintenance’s Role in Valuation

A bike’s condition is paramount; meticulous maintenance records demonstrate responsible ownership, boosting resale value. Regular servicing and prompt repairs significantly impact perceived worth and buyer confidence.

Assessing Bike Condition

Thorough assessment is crucial for accurate valuation. Begin with a visual inspection, noting any scratches, dents, or corrosion on the frame. Carefully examine the fork for leaks or damage, and check the headset for play. Inspect the wheels for trueness, spoke tension, and tire wear – noting any cuts or bulges.

Evaluate the drivetrain meticulously. Check chain wear using a chain checker tool, assess cassette and chainring teeth for wear, and ensure smooth shifting across all gears. Brakes should be tested for responsiveness and pad life. Cables and housing should be inspected for fraying or damage.

Don’t overlook smaller details. Grips, pedals, and saddle should be in good condition. Ensure all bolts are tightened to the correct torque. A clean bike presents better and suggests diligent maintenance. Document any flaws with photographs for transparency, and be realistic about their impact on value.

The Importance of Regular Maintenance Records

Detailed maintenance records significantly boost a bike’s resale value. Prospective buyers gain confidence knowing the bike has been well-cared for, reducing concerns about hidden issues. Records should include dates and descriptions of services performed, such as tune-ups, brake bleeds, cable replacements, and drivetrain cleaning/lubrication.

Documentation of component replacements is vital. Note when parts like the chain, cassette, tires, and brake pads were changed. Receipts for major repairs or upgrades provide further proof of investment and care. A consistent maintenance schedule demonstrates a commitment to preserving the bike’s performance and longevity.

Organized records showcase responsibility. A simple spreadsheet or dedicated notebook can suffice. Even photos documenting maintenance steps can be helpful. Presenting these records alongside the bike builds trust and justifies a higher asking price, ultimately streamlining the sale process.

Current Market Trends (as of March 2026)

As of March 31, 2026, new bike releases—like Hope’s HB912 and Teewing’s Flux—are impacting valuations, while the rise of 32-inch wheels is shifting perceptions.

Impact of New Bike Releases (e.g., Hope HB912, Teewing Flux)

The introduction of innovative bikes significantly influences the used market. Hope’s HB912 trail bike, officially unveiled after its initial reveal at the Les Gets World Cup, is creating ripples. Its advanced design and features are setting a new benchmark, potentially depreciating the value of older trail bikes lacking comparable technology. Similarly, Teewing’s Flux enduro eMTB, showcased at the Core Bike Show, is impacting the e-MTB segment.

These releases aren’t just about the bikes themselves; they represent advancements in engineering and materials. The presence of these cutting-edge models often leads consumers to seek upgrades, increasing the supply of used bikes and potentially lowering prices. Furthermore, the hype surrounding new releases can temporarily inflate the value of similar models from the same brand, as demand increases. However, this effect is usually short-lived, as the market adjusts.

It’s crucial for sellers to acknowledge these trends when pricing their bikes. A bike that was considered high-end last year might now be positioned as mid-range due to the arrival of newer, more capable alternatives.

The Rise of 32-inch Wheels and Potential Value Shifts

The mountain bike industry is experiencing a notable shift with the increasing adoption of 32-inch wheels. While previously dominated by 29 and 27.5-inch sizes, the emergence of 32-inch wheels is poised to disrupt the market and influence bike valuations. This change isn’t simply about a larger wheel size; it represents a fundamental alteration in bike geometry and handling characteristics.

Currently, the industry seems unable to fully embrace this change, but the momentum is building. Bikes equipped with 32-inch wheels are gaining traction, particularly among riders seeking enhanced stability and rollover capabilities. As demand for these bikes increases, we can anticipate a potential decrease in the resale value of bikes with older wheel sizes.

Sellers should be aware of this trend and adjust their pricing accordingly. Bikes with 29 or 27.5-inch wheels may need to be priced more competitively to attract buyers, while those with 32-inch wheels could command a premium, especially if they are newer models.

BC Bike Fest and Regional Market Influences

The inaugural BC Bike Fest, scheduled for May 29-31, 2026, in the Cowichan Valley, Vancouver Island, is set to significantly impact the regional bicycle market. This event, hosting three races, will draw attention and potentially inflate demand for bikes within British Columbia and surrounding areas.

Increased visibility and rider participation at BC Bike Fest are likely to create a temporary surge in demand for mountain bikes, particularly trail and enduro models. Sellers in the region should anticipate heightened interest and potentially higher resale values during and immediately following the festival.

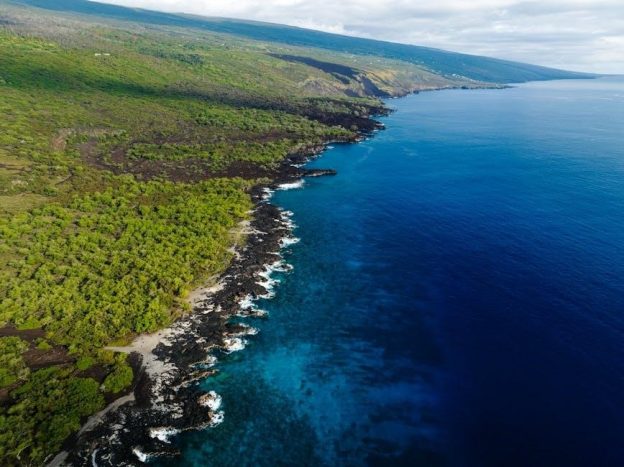
However, regional market influences extend beyond the festival itself. Local riding conditions, trail networks, and the overall cycling culture of Vancouver Island will continue to shape bike preferences and valuations. Bikes well-suited to the region’s terrain – robust hardtails and full-suspension models – will likely maintain stronger resale values.

Monitoring local listings and attending regional events will be crucial for accurately assessing bike values.

vtech phone troubleshooting guide

VTech Phone Troubleshooting Guide ─ Overview

Navigating VTech phone issues requires checking power‚ connections‚ and handset synchronization; resetting can often resolve problems‚ alongside verifying voicemail access and call forwarding․

Understanding Common VTech Phone Issues

VTech phone problems frequently stem from a loss of dial tone‚ often because the base unit lacks power or a secure phone line connection․ Handsets displaying “No Line” indicate a synchronization issue or a problem with the base unit receiving a signal․ Battery issues are also prevalent‚ causing handsets to fail to power on or hold a charge․

Outgoing call failures can arise from improperly connected phone lines‚ interference from cable/modem connections‚ or handsets not being correctly registered․ Incoming call problems often relate to low ringer volumes or the phone simply not ringing at all․ Voicemail access issues are commonly due to incorrect PINs or an inactive phone line․ These are the most frequent issues users encounter․

Power and Connectivity Checks

Begin troubleshooting by ensuring the base unit is powered on and has a dial tone; verify handset batteries are installed correctly and fully charged․

Verifying Base Unit Power Supply

Confirm the VTech base unit is securely plugged into a working electrical outlet․ Test the outlet with another device to rule out a power source issue․ Inspect the power adapter for any visible damage‚ such as frayed wires or cracks – a damaged adapter must be replaced․

If using a power strip‚ ensure it’s switched on and functioning correctly․ A faulty power strip can prevent the base unit from receiving power․ Occasionally‚ the internal fuse within the base unit may blow; consult the user manual for instructions on locating and replacing it․ Remember‚ a base unit without power means no signal to the handsets‚ rendering the entire system unusable․ Prioritize confirming a stable power supply before investigating other potential issues․

Confirming Dial Tone at the Base Unit

After verifying power‚ confirm the base unit has a dial tone․ This indicates a proper connection to the phone line․ Disconnect and reconnect the phone line cord to both the base unit and the wall jack‚ ensuring a secure fit․ If you have a DSL filter‚ make sure it’s correctly installed․

Test the phone line directly by plugging a known working phone into the same wall jack․ If the working phone also lacks a dial tone‚ the issue lies with your phone service provider or the line itself․ If the working phone has a dial tone‚ the problem is specifically with the VTech base unit․ A missing dial tone at the base unit will prevent all handsets from making or receiving calls‚ as they rely on the base for line signal․

Checking Handset Battery Installation & Charge

Ensure the handset batteries are correctly installed‚ observing the proper polarity (+ and -)․ Even seemingly correct installation can sometimes be faulty; remove and reinsert the batteries to confirm․ Use only the recommended battery type for your VTech model – incorrect batteries can cause performance issues․

Place the handset on the base unit’s charger for at least 16 hours to achieve a full charge‚ especially if it’s a new handset or the batteries have been depleted․ A low battery can cause various problems‚ including a “Low Battery” display or the handset not powering on․ If the handset still won’t charge‚ try a different outlet or verify the charging contacts on both the handset and base are clean and unobstructed․

Handset Connection Problems

Handset issues often stem from synchronization failures or a “No Line” display; ensure proper registration to the base unit for reliable connectivity and function․

Ensuring Handset Synchronization with Base

Successful communication relies on proper handset synchronization with the VTech base unit․ If experiencing connection issues‚ begin by ensuring the handset is within range of the base․ A simple reset – removing handset batteries and unplugging the base for a minute – can often re-establish the link․

After reconnection‚ allow sufficient time for the handset to automatically synchronize․ If it fails‚ consult your VTech model’s manual for specific re-synchronization procedures‚ which may involve pressing a specific button combination on both the handset and base unit․

Interference from other wireless devices can sometimes disrupt synchronization․ Try relocating the base unit away from potential sources of interference․ Consistent synchronization problems may indicate a faulty handset or base unit requiring further investigation or support․

Troubleshooting “No Line” Display on Handsets

A “No Line” display on your VTech handset typically indicates a problem with the connection between the handset and the base unit‚ or the base unit’s connection to the phone line․ First‚ verify the phone line is securely plugged into both the wall jack and the base unit․ Ensure the base unit has power and a dial tone – test with a known working phone if needed․

If the base has a dial tone‚ attempt to resynchronize the handset with the base (see previous section)․ Sometimes‚ simply unplugging and replugging the base unit’s power adapter can resolve the issue․ A loose cable connection to the cable modem (if applicable) can also cause this error; try reseating the cable․

If the problem persists‚ contact VTech support at 1-800-595-9511 for further assistance․

Outgoing Call Issues

Confirm a secure phone line connection‚ check for cable/modem interference‚ and ensure proper handset registration to the base unit for successful outgoing calls․

Verifying Phone Line Connection to Wall Jack

A fundamental step in troubleshooting VTech phone issues involves meticulously checking the physical connection to the wall jack․ Begin by ensuring the phone cord is securely plugged into both the base unit and the wall jack․ It sounds simple‚ but a loose connection is a surprisingly common culprit!

If you’ve recently moved or had work done on your phone lines‚ verify that the wall jack itself is active․ A helpful trick‚ suggested by users experiencing similar problems‚ is to temporarily disconnect and reconnect the cable line to your modem/phone unit – sometimes this reseats the connection and restores dial tone․

Also‚ consider testing a different phone cord to rule out a faulty cable․ Finally‚ if you share a line with other devices (like an answering machine)‚ ensure those connections aren’t interfering with the VTech system’s signal․

Investigating Cable/Modem Connection Interference

Modern phone systems‚ particularly those utilizing digital signals‚ can be susceptible to interference from cable and modem connections․ Many users share a single cable line for both internet and phone service‚ creating potential conflicts․ Examine the coaxial cable connecting your modem; ensure it’s tightly secured at both ends – the wall and the modem itself․

As one user discovered‚ simply unscrewing and re-tightening this cable can resolve “No Line” issues․ Interference can also stem from splitters used to distribute the signal․ Try bypassing any unnecessary splitters to establish a direct connection․

Furthermore‚ some modems emit electrical noise․ If possible‚ physically separate the VTech base unit from the modem to minimize potential interference․ Remember to reboot both devices after making any connection changes․

Confirming Handset Registration to Base Unit

A frequent cause of VTech phone malfunctions is a handset losing registration with the base unit․ If your handset displays “No Line” or fails to connect‚ verifying registration is crucial․ Typically‚ a registration process occurs automatically when you place the handset on the base or after inserting batteries․

However‚ this can fail․ Consult your VTech model’s user manual for the specific registration procedure – often involving pressing and holding a “Talk” or “Menu” button on both the handset and base unit simultaneously․

Ensure the handset is within range of the base during registration․ If repeated attempts fail‚ a reset of both the base unit and handset (unplugging/battery removal) may be necessary before re-attempting the registration process․

Incoming Call Problems

Troubleshoot incoming calls by checking ringer volume‚ ensuring the phone is actually ringing‚ and verifying proper line connectivity for reliable call reception․

Checking Ringer Volume Settings

A common reason for missed calls is an improperly adjusted ringer volume․ Begin by accessing the volume control on your VTech handset; this is usually found within the settings menu‚ often indicated by a gear or wrench icon․ Navigate through the options to locate the ringer volume setting․

Ensure the volume is set to a level audible enough for your environment‚ but not so loud as to be disruptive․ Many VTech phones offer multiple ringer levels or a customizable volume scale․ Test the ringer by having someone call the phone while you observe the volume level․

Also‚ check if a “Do Not Disturb” or silent mode is activated‚ as this will suppress incoming call alerts․ Finally‚ confirm that the ringer type is set to your preference – some models allow selection between various tones or melodies․

Troubleshooting Phone Not Ringing

If your VTech phone isn’t ringing‚ several factors could be at play․ First‚ verify the ringer volume isn’t muted or set too low‚ as detailed previously․ Next‚ confirm the handset is properly synchronized with the base unit; a weak connection can prevent ring transmission․

Check for active call forwarding – if enabled‚ calls may be diverted before reaching your phone․ Ensure the phone line is functioning correctly by testing another device․ A faulty phone line or service outage could be the root cause․

Consider a base unit reset; unplugging and reconnecting can resolve temporary glitches․ Finally‚ if using a combination cable/phone unit‚ try reseating the cable connection‚ as a loose connection can sometimes cause this issue․

Voicemail Access Issues

Confirming the correct voicemail PIN and verifying an active phone line are crucial first steps when encountering access problems with your VTech voicemail system․

Confirming Voicemail PIN Accuracy

A frequently overlooked issue preventing voicemail access is an incorrect Personal Identification Number (PIN)․ Many users inadvertently forget or misremember their PIN‚ especially after a long period without access․ To verify‚ attempt to access voicemail and carefully enter the PIN․ If unsuccessful after several attempts‚ consult your VTech phone’s manual for PIN reset instructions․

Typically‚ resetting a forgotten PIN involves contacting your phone service provider‚ who will guide you through a verification process to confirm your identity․ Some providers allow online PIN resets through their website or mobile app․ Ensure you’re using the correct access number for your voicemail – this information is usually found in your phone’s documentation or on your provider’s website․ Double-check for typos during entry‚ and remember that PINs are case-sensitive in some instances․

Verifying Active Phone Line for Voicemail

Before troubleshooting voicemail access‚ confirm your phone line is genuinely active․ A disconnected or suspended line will naturally prevent voicemail functionality․ Test the line by making an outgoing call from a different phone connected to the same jack․ If calls fail‚ contact your phone service provider to verify account status and line activation․

Ensure there are no outstanding bills or service interruptions․ Sometimes‚ temporary outages can affect voicemail services even if the primary line appears functional․ Also‚ check if any features like call blocking are inadvertently preventing access to voicemail․ A stable dial tone at the base unit of your VTech phone is a good initial indicator‚ but doesn’t guarantee full service functionality․ Confirm with your provider for definitive confirmation․

Advanced Troubleshooting Steps

For persistent issues‚ try resetting both the base unit and handsets‚ or updating the VTech phone’s firmware to the latest version for optimal performance․

Performing a Reset (Base Unit & Handsets)

When facing stubborn issues‚ a reset is often the solution․ Begin by unplugging the base unit from the power outlet․ Simultaneously‚ remove the batteries from all connected handsets․ Allow approximately one to two minutes for the system to completely discharge․ This clears any temporary settings causing conflicts․

Next‚ reconnect the base unit to the power outlet․ Then‚ reinsert the batteries into each handset․ Allow the handsets to power on and automatically synchronize with the base unit․ This process can take several minutes․ If synchronization fails‚ consult the user manual for specific re-registration instructions․ A successful reset restores factory settings‚ resolving many software-related problems and improving overall performance․

Updating VTech Phone Firmware

Keeping your VTech phone’s firmware updated is crucial for optimal performance and security․ Outdated firmware can lead to various issues‚ including call quality problems and compatibility concerns․ Visit the official VTech website and navigate to the support section for your specific phone model․

Download the latest firmware version available․ Follow the on-screen instructions carefully‚ as the update process varies depending on the model․ Typically‚ it involves connecting the base unit to a computer via USB or utilizing a specific key combination on the handset․ Ensure the base unit remains powered on throughout the entire update process to prevent data corruption․ Regular updates address bugs and enhance functionality․

Contacting Support

For persistent issues‚ reach out to VTech Customer Support at 1-800-595-9511․ Also‚ double-check call forwarding settings for potential conflicts․

VTech Customer Support Phone Number

When self-troubleshooting proves insufficient‚ direct assistance from VTech’s dedicated support team is readily available․ The primary contact number for VTech Communications is 1-800-595-9511․ Be prepared to have your phone model number and a detailed description of the issue you are experiencing readily available when you call․

Support representatives can guide you through more complex troubleshooting steps‚ offer insights specific to your VTech phone model‚ and potentially assist with warranty claims if applicable․ It’s often helpful to have already attempted basic resets and connection checks before contacting support to expedite the process․ Remember to note the date and time of your call‚ and the name of the representative you spoke with for future reference․

Checking Call Forwarding Settings

Unexpected call behavior can often be traced back to inadvertently activated call forwarding․ Verify your call forwarding settings with your phone service provider to ensure calls aren’t being redirected without your knowledge․ This is a crucial step‚ as active forwarding can explain why incoming calls aren’t reaching your VTech phone․

Many providers offer online portals or automated phone systems to manage these settings․ Deactivate any active forwarding rules if you intend for all calls to ring directly to your VTech handset․ Remember to test the changes by having someone call your number after adjusting the settings․ Incorrect forwarding configurations are a surprisingly common cause of incoming call issues․

ralph lauren shoe size guide

Navigating Ralph Lauren footwear requires understanding their diverse lines and sizing nuances. This guide provides essential information for finding your perfect fit, considering variations across collections and styles.

Understanding Ralph Lauren Shoe Lines

Ralph Lauren offers a spectrum of shoe lines, each with a distinct aesthetic and, potentially, subtle sizing differences. The Ralph Lauren Collection represents the brand’s luxury tier, often featuring sophisticated designs and premium materials – size consistency is generally reliable within this line. Lauren Ralph Lauren provides a more accessible price point, with classic styles suitable for everyday wear; slight variations may occur.

Polo Ralph Lauren focuses on sporty and casual footwear, including sneakers and boat shoes; sizing tends to be standard, but it’s always wise to consult specific charts. Additionally, collaborations or limited-edition releases might deviate from standard sizing. Recognizing these distinctions is crucial for accurate selection. Checking individual product descriptions for specific sizing recommendations is highly advised, as Ralph Lauren occasionally adjusts fits based on style and season. Understanding these lines helps refine your search and improve your chances of a comfortable, stylish fit.

Ralph Lauren Size Variations Across Collections

While Ralph Lauren strives for consistency, size variations do exist across its collections. The Ralph Lauren Collection, emphasizing refined craftsmanship, often runs true to size, but a slightly narrower fit is common. Lauren Ralph Lauren, geared towards broader appeal, may offer a more generous width, potentially requiring a half-size down for a secure fit.

Polo Ralph Lauren sneakers and casual shoes generally adhere to standard US sizing, though individual styles can differ. Notably, boots – particularly those with thicker linings – might necessitate considering a half-size larger. Leather composition and shoe construction also influence fit. Always prioritize checking specific size charts provided with each product. Customer reviews can offer valuable insights into how a particular style runs. Acknowledging these nuances ensures a more accurate selection and minimizes the risk of ill-fitting shoes.

Decoding Ralph Lauren Women’s Shoe Sizes

Understanding women’s Ralph Lauren sizing involves US to EU conversions, width options, and style-specific charts for heels, flats, and boots—crucial for a perfect fit.

US to EU Size Conversion for Women

Converting between US and EU sizes is essential when shopping for Ralph Lauren women’s shoes, as the brand utilizes both systems. A general guideline shows a US size 6 corresponds to a European size 36, while a US 7 equates to EU 37. Moving up, a US 8 typically translates to EU 38, a US 9 to EU 39, and a US 10 to EU 40. However, it’s crucial to remember these are approximations.

Variations can occur between different Ralph Lauren collections and shoe styles. For instance, some lines might run slightly smaller or larger than others. Therefore, always consult the specific size chart provided for the particular shoe you are interested in. Checking product descriptions or the official Ralph Lauren website is highly recommended. Additionally, considering your foot shape and any specific fit preferences is vital for selecting the correct size. If you’re between sizes, it’s generally advisable to size up, especially for closed-toe shoes.

Width Options in Ralph Lauren Women’s Shoes

Ralph Lauren women’s shoes generally offer standard width options, typically designated as ‘Medium’ (B). However, availability of wider or narrower widths can vary significantly depending on the specific style and collection. Some collections, particularly those featuring classic designs like Mary Janes or boots, may include wider width options, often labeled as ‘Wide’ (D).

Finding shoes in narrower widths can be more challenging, but certain retailers specializing in extended sizes might carry limited selections. It’s essential to check the product details online or contact customer service to confirm width availability before purchasing. If you consistently require a wider or narrower fit, consider exploring styles designed with adjustable features, such as buckles or laces, to customize the fit. Understanding your foot’s width is crucial for comfort and proper support, preventing blisters and ensuring a secure fit.

Specific Size Charts for Popular Women’s Styles (Heels, Flats, Boots)

Ralph Lauren doesn’t publish universally standardized size charts differing significantly by style. However, general guidelines apply. For heels, consider a half-size down if you experience slippage, as the heel cup can alter fit. Flats often run true to size, but checking reviews for specific styles is advisable.

Boots, particularly ankle boots like the Shaw style, may require considering sock thickness. A slightly larger size might be necessary for wearing thicker socks during colder months. Lauren Ralph Lauren Londyn Mary Janes, available in sizes like 7B-Medium to 9.5B-Medium, demonstrate the importance of checking individual style availability. Always consult the size chart provided on the retailer’s website for the most accurate information, as variations can occur. Prioritize trying on shoes whenever possible to ensure optimal comfort and fit.

Navigating Ralph Lauren Men’s Shoe Sizes

Men’s Ralph Lauren sizing requires converting between US, UK, and EU standards. Width options are crucial for comfort, impacting the overall fit of dress shoes and sneakers.

US to UK/EU Size Conversion for Men

Understanding the conversion between US, UK, and EU shoe sizes is vital when purchasing Ralph Lauren men’s footwear. While generally consistent, slight variations can occur. Here’s a comprehensive guide to help you find your equivalent size.

US Size 7 typically translates to a UK Size 6.5 and a EU Size 40. US Size 8 corresponds to UK 7.5 and EU 41. US Size 9 equates to UK 8.5 and EU 42. US Size 10 is generally a UK 9.5 and EU 43; US Size 11 converts to UK 10.5 and EU 44. US Size 12 is approximately UK 11.5 and EU 45.

It’s important to note these are average conversions. Some Ralph Lauren styles may run slightly larger or smaller. Always refer to the specific size chart provided for the particular shoe you are interested in. Considering the shoe type – dress shoes, sneakers, or loafers – can also influence the best fit, as constructions differ.

Width Options in Ralph Lauren Men’s Shoes

Ralph Lauren recognizes that a perfect fit extends beyond length, offering various width options in their men’s shoe collections. Understanding these widths is crucial for optimal comfort and support.

Typically, Ralph Lauren men’s shoes are available in Medium (D), Wide (EE), and Extra Wide (EEE) widths. The Medium width suits most standard feet. If you experience tightness or discomfort across the ball of your foot, a Wide width might be more suitable. For those with particularly broad feet, the Extra Wide option provides ample space.

Determining your correct width involves measuring the circumference of your foot at its widest point. Comparing this measurement to Ralph Lauren’s width chart will help pinpoint the best fit. Remember that width availability can vary depending on the specific style and size. Always check the product details before purchasing to confirm width options.

Sizing for Different Men’s Shoe Types (Dress Shoes, Sneakers, Loafers)

Ralph Lauren men’s shoes, while generally adhering to standard US sizing, can exhibit slight variations depending on the shoe type. Dress shoes, often with a more structured fit, may require a half size larger than your typical sneaker size for optimal comfort.

Sneakers, designed for athletic activity and comfort, usually fit true to size. However, consider sock thickness when selecting your size. Loafers, depending on their construction and material, can also vary. More structured leather loafers might benefit from a half size up, while softer, more flexible styles may fit true to size.

Always refer to the specific size chart for the particular style you are considering. Paying attention to customer reviews can also provide valuable insights into how a specific shoe tends to fit. Prioritizing a comfortable and secure fit is essential for enjoying your Ralph Lauren footwear.

Ralph Lauren Kids’ Shoe Sizing

Accurate sizing is crucial for growing feet! Utilize Ralph Lauren’s specific kids’ charts – infant, toddler, and youth – and measure frequently for the best fit.

Kids’ Shoe Size Charts (Infant, Toddler, Youth)

Ralph Lauren employs distinct sizing charts for each developmental stage of a child’s foot. Infant sizes typically range from 1 to 10, often correlating with foot length in inches. Toddler sizes generally begin at 4T and extend up to 13T, accommodating the rapid growth experienced during these years. It’s important to note that ‘T’ denotes toddler sizing.

Youth sizes, starting around 1Y and progressing to 7Y, bridge the gap between toddler and adult footwear. These charts are crucial because children’s feet grow quickly, and a proper fit is essential for healthy development. Always consult the official Ralph Lauren size chart, as variations can occur between different styles and collections. Remember to measure both feet, as one foot is often slightly larger than the other, and fit the shoe to the larger foot. Regularly checking the fit is vital to ensure continued comfort and support.

Measuring a Child’s Foot for Accurate Sizing

Accurate foot measurement is paramount when selecting Ralph Lauren shoes for children. Begin by having your child stand with their heel against a wall on a firm surface. Place a piece of paper against the wall, ensuring it extends beyond their longest toe. Trace the outline of their foot carefully, keeping the pen vertical;

Measure the length from the heel to the tip of the longest toe in inches or centimeters. Repeat for both feet, as size discrepancies are common. When consulting the Ralph Lauren size chart, use the larger measurement. It’s best to measure feet in the afternoon, as they tend to swell slightly throughout the day. Allow for approximately half an inch of growing room for a comfortable fit. Consider the sock thickness your child will typically wear with the shoes when measuring.

Tips for Finding the Perfect Fit

Achieving a comfortable fit involves precise foot measurement, considering sock thickness, and understanding how a shoe’s ‘last’ – its internal form – impacts overall comfort.

How to Measure Your Feet at Home

Accurate foot measurement is crucial for selecting the correct Ralph Lauren shoe size. Begin by placing a piece of paper larger than your foot flat on the floor, ideally against a wall. Wearing socks similar to those you’d wear with the shoes, stand with your heel against the wall.

Trace your foot carefully with a pen or pencil, keeping it as close to the foot as possible. Repeat for the other foot, as sizes can vary. Measure the length of each tracing from the heel to the longest toe in inches or centimeters.

Compare your measurements to the Ralph Lauren size chart for the specific shoe line you’re interested in. Remember to account for any width preferences. It’s always best to measure both feet and use the larger measurement as your guide. Consider measuring later in the day, as feet tend to swell slightly.

Considering Sock Thickness

When determining your Ralph Lauren shoe size, always factor in the thickness of the socks you intend to wear. A thin sock will require a snugger fit than a thick, cushioned sock. If you plan to wear thicker socks with boots or dress shoes, it’s advisable to measure your feet while wearing those socks during the fitting process.

For sneakers or casual shoes, consider the typical sock thickness you’ll use. Adding extra space for thicker socks can prevent discomfort and blisters. Conversely, choosing a shoe that’s too large due to excessive sock thickness can lead to slippage and reduced support.

Ultimately, the goal is to achieve a comfortable and secure fit. Account for sock thickness during measurement and when comparing your foot length to the Ralph Lauren size charts to ensure optimal comfort and performance.

Understanding Shoe Lasts and Their Impact on Fit

The “last” of a shoe is the foot-shaped form around which the shoe is constructed, significantly influencing its fit and feel; Ralph Lauren, like other brands, utilizes various lasts to cater to different foot shapes and shoe styles. A wider last accommodates broader feet, providing more room in the forefoot and toe box, while a narrower last suits slimmer feet.

Different shoe types often employ specific lasts. Dress shoes frequently feature a more streamlined last for a polished appearance, potentially requiring a precise fit. Sneakers may utilize a more relaxed last for comfort and athletic performance. Understanding the last can help you anticipate how a particular Ralph Lauren shoe will feel.

Consider your foot’s width and volume when selecting shoes, and research the last used in the specific style you’re interested in for a more accurate fit.

Common Sizing Issues and Solutions

If Ralph Lauren shoes feel off, consider inserts or thicker socks. Review their exchange policy for hassle-free returns and finding the ideal size.

Dealing with Shoes That Are Too Big or Too Small

Encountering a poor fit with your Ralph Lauren shoes can be frustrating, but several solutions exist before resorting to a return. If shoes are slightly too large, consider utilizing thicker socks, particularly during colder months, to fill some of the excess space and provide a more secure feel. Alternatively, insoles can be incredibly effective; gel or foam insoles add cushioning and take up volume within the shoe.

For shoes that are too small, thin socks are a temporary fix, but prolonged use can lead to discomfort. Shoe stretchers can gently expand the shoe’s width, particularly in leather styles, but this requires patience and isn’t suitable for all materials. If these methods prove insufficient, consulting Ralph Lauren’s return and exchange policy is the best course of action. Ensure you retain the original packaging and proof of purchase for a smooth process. Prioritizing a proper fit prevents blisters and ensures lasting comfort.

Ralph Lauren Return and Exchange Policy for Shoes

Ralph Lauren generally accepts returns and exchanges of unworn, undamaged shoes within 30 days of the purchase date, with the original receipt or proof of purchase. Items must be returned in their original packaging, including all tags and accessories. Returns can be initiated online through the Ralph Lauren website or at a Ralph Lauren retail store.

Please note that final sale items are typically not eligible for return or exchange. Shipping costs for returns may be the responsibility of the customer, depending on the reason for the return and the original shipping method. Exchanges are subject to availability. It’s advisable to review the complete and most up-to-date return policy on the official Ralph Lauren website before making a purchase, as policies can occasionally change. Carefully checking the size and style before ordering minimizes the need for returns.

chris hadfield guide to life on earth

Chris Hadfield’s memoir transcends a typical space narrative, offering profound life lessons gleaned from his extraordinary experiences. He discovered that preparing for space unexpectedly equipped him for a better life on Earth.

The Unexpected Lessons of Space Travel

Hadfield’s journey to space wasn’t solely about rockets and zero gravity; it became a masterclass in self-improvement. He surprisingly found that the rigorous training and demands of space travel translated into valuable principles for everyday life. The book often veers into “life lesson” territory, emphasizing the crucial importance of competence – a theme repeatedly highlighted as foundational for success.

The memoir details the smaller, stranger aspects of space travel, like the sensation of skin’s weight upon returning to Earth’s gravity after months in zero-g. This experience, and others, fostered a unique perspective. He learned “how to live better and more happily here on Earth,” a sentiment resonating deeply with readers. It’s a testament to the idea that extreme environments can reveal fundamental truths about human existence and resilience.

From Astronaut to Life Coach: A Unique Perspective

Chris Hadfield’s transition from astronaut to a source of wisdom is striking. His dedication, passion, and achievements inspire admiration, even in those with no aspiration for space travel. He imparts knowledge with an “unwaveringly positive attitude,” making his lessons accessible and impactful. This perspective isn’t about replicating his experiences, but about applying the principles he learned to navigate life’s challenges.

Readers have found the book profoundly moving, with some describing it as life-changing, particularly during personal growth journeys. Hadfield’s voice – and the suggestion that the book might be even better as an audiobook – adds to his appeal, lending authenticity to the technical “astronaut lingo.” He offers a rare blend of expertise and relatable humanity, making his guidance uniquely valuable.

Core Principles: Competence as a Foundation

Hadfield’s core message centers on competence – being skilled, continuously learning, and understanding its vital importance for success and a fulfilling life, both on Earth and beyond.

The Importance of Skill Development

Chris Hadfield emphasizes that deliberate skill development isn’t merely about achieving goals, but about building a robust foundation for navigating life’s inherent uncertainties. He illustrates this through his astronaut training, where mastering countless procedures – from piloting to systems repair – was paramount.

This isn’t limited to specialized fields; Hadfield’s message applies universally. He advocates for proactively acquiring knowledge and honing abilities, recognizing that competence breeds confidence and resilience; The book subtly suggests that a life dedicated to learning is a life well-lived, preparing individuals for both anticipated and unforeseen challenges.

He doesn’t present skill acquisition as a chore, but as an empowering process. By becoming proficient in various areas, one gains a sense of control and the ability to adapt, ultimately enhancing their overall well-being and capacity to contribute meaningfully.

Continuous Learning and Adaptation

Hadfield’s journey highlights the critical need for continuous learning, extending far beyond formal education. Space travel demands constant adaptation to novel situations and unexpected problems, a mindset he advocates for in all aspects of life. He demonstrates that a willingness to embrace new information and adjust strategies is essential for success, and even survival.

The memoir subtly critiques complacency, suggesting that stagnation hinders growth and limits potential. Hadfield’s own path exemplifies a commitment to lifelong learning, constantly seeking to expand his knowledge base and refine his skills. This adaptability isn’t simply reactive; it’s a proactive approach to anticipating change and preparing for the unknown.

He implies that the ability to learn how to learn is as valuable as the knowledge itself, fostering resilience and empowering individuals to navigate an ever-evolving world.

Understanding the Value of Preparation

Hadfield’s meticulous approach to astronaut training underscores a central theme: thorough preparation is paramount. He didn’t simply dream of space; he systematically acquired the skills and knowledge necessary to thrive in that environment. This wasn’t limited to technical expertise, but extended to anticipating potential challenges and developing contingency plans.

The book reveals that preparation isn’t about eliminating risk, but about mitigating it. By proactively addressing potential problems, Hadfield fostered a sense of control and confidence, even in the face of uncertainty. He emphasizes that competence, repeatedly, is built upon a foundation of diligent preparation.

This principle translates directly to everyday life, suggesting that investing time in planning and skill development yields significant returns, reducing stress and increasing the likelihood of achieving desired outcomes. It’s a proactive philosophy, empowering individuals to shape their own destinies.

Facing Challenges: Hadfield’s Approach

Hadfield consistently demonstrates a positive attitude and embraces risk, viewing challenges as opportunities for growth. His methodical problem-solving skills were crucial in high-pressure situations.

Embracing Risk and Uncertainty

Chris Hadfield’s approach to space travel, and life, hinges on accepting inherent risks and uncertainties. He doesn’t portray a fearless persona, but rather one meticulously prepared to handle the unexpected. This preparation isn’t solely technical; it’s a mental framework for acknowledging what could go wrong and developing contingency plans.

The memoir highlights that eliminating risk isn’t the goal, but understanding and mitigating it. Hadfield’s calm demeanor, even in simulated emergencies, stems from this acceptance. He views uncertainty not as a deterrent, but as a constant companion in any ambitious endeavor. This philosophy translates powerfully to everyday life, encouraging readers to step outside their comfort zones with informed confidence.

He demonstrates that proactive planning and a realistic assessment of potential failures are key to navigating life’s unpredictable nature, ultimately fostering resilience and a positive outlook.

Problem-Solving Under Pressure

Hadfield’s training as an astronaut heavily emphasized methodical problem-solving, a skill honed for the extreme pressures of spaceflight. He details scenarios demanding quick, rational responses to unexpected malfunctions, illustrating the importance of remaining calm and focused amidst chaos. This isn’t about innate brilliance, but a learned process of breaking down complex issues into manageable steps.

The book showcases his ability to prioritize, analyze available data, and execute solutions efficiently, even when facing limited resources or time. He stresses the value of clear communication and collaboration within a team, recognizing that diverse perspectives enhance problem-solving capabilities.

This approach isn’t confined to spacecraft; Hadfield argues it’s universally applicable, offering a framework for tackling challenges in any field. His experiences demonstrate that preparation and a systematic mindset are crucial for effective decision-making under duress.

Maintaining a Positive Attitude

Chris Hadfield’s unwavering positivity shines throughout his memoir, presented not as naive optimism, but as a deliberate and crucial survival strategy. He emphasizes that a constructive outlook isn’t simply ‘nice to have’ – it’s fundamental to effective performance, especially when confronting adversity. This attitude, as described by admirers, is remarkably consistent and impactful.

He illustrates how focusing on what can be controlled, rather than dwelling on uncontrollable factors, fosters resilience and proactive problem-solving. This mindset extends to accepting challenges as opportunities for growth and learning, rather than insurmountable obstacles.

Hadfield’s ability to find wonder and gratitude even in the isolating and demanding environment of space underscores the power of perspective. He imparts knowledge in a way that inspires readers to cultivate a similar outlook in their own lives, regardless of their circumstances.

The Physical and Mental Toll

Returning to Earth presented unexpected physical challenges, like the sensation of heavy skin after prolonged weightlessness. Isolation also impacted psychological well-being, demanding self-awareness.

Readjusting to Earth’s Gravity

The return to Earth’s gravity wasn’t a triumphant landing into ease, but a surprisingly jarring readjustment. Hadfield vividly describes the peculiar sensation of his skin feeling intensely heavy, a direct consequence of six months spent in zero gravity. This wasn’t simply a matter of muscle atrophy; it was a fundamental shift in how his body perceived weight and pressure.

Beyond the physical discomfort, the re-entry process demanded a deliberate recalibration of movement and balance. Simple actions, previously effortless in space, now required conscious effort and coordination. It highlighted the body’s remarkable adaptability, but also the significant toll space travel takes on the human form. This experience underscored the importance of preparation, not just for the challenges of space, but for the challenges returning from it.

Hadfield’s account isn’t focused on complaining, but on observing and understanding the body’s response, a hallmark of his analytical approach to life, both on and off the planet.

The Psychological Impact of Isolation

Space travel, while physically demanding, presents a unique set of psychological challenges. Prolonged isolation, confined within the spacecraft, necessitates a robust mental fortitude. Though not explicitly detailed in the provided text, it’s implied that Hadfield’s success stemmed from his ability to manage the inherent loneliness and detachment from Earthly connections.

The memoir’s resonance with readers, and the emotional response it evokes – even bringing some to tears – suggests a universal understanding of the human need for connection. Hadfield’s journey, therefore, isn’t just about conquering space, but about conquering internal struggles.

His positive attitude, consistently highlighted, likely served as a crucial coping mechanism. Maintaining perspective and focusing on the mission’s objectives would have been essential in mitigating the psychological strain. The book’s impact on personal growth speaks to its ability to inspire resilience in the face of adversity, even those not involving space travel.

The Power of Mindfulness and Self-Awareness

While the provided text doesn’t directly address mindfulness, Hadfield’s meticulous preparation and calm demeanor suggest a high degree of self-awareness. Astronaut training demands an intimate understanding of one’s capabilities and limitations – a form of internal assessment crucial for success in high-pressure environments.

His ability to impart knowledge in an accessible way, and the positive impact his book has on readers striving for self-improvement, hints at a mindful approach to life. The emotional connection readers feel suggests Hadfield’s wisdom resonates on a deeper level, prompting introspection and personal growth.

The book’s transformative effect on one reader, aiding their “long and painful journey working on themselves,” underscores the power of perspective. Hadfield’s experiences, shared with clarity and humility, offer a framework for navigating life’s challenges with intention and self-compassion.

Legacy and Impact: A Life-Changing Book

Hadfield’s An Astronaut’s Guide to Life on Earth deeply resonates with readers, inspiring personal growth and offering a unique perspective on navigating life’s complexities.

The Book’s Resonance with Readers

Chris Hadfield’s book has demonstrably impacted many, often on a deeply emotional level. Readers report feeling inspired to actively work on self-improvement, finding the astronaut’s wisdom particularly helpful during challenging personal journeys. The memoir isn’t simply about space travel; it’s about applying the discipline and mindset required for such endeavors to everyday life.

Many appreciate the book’s blend of practical advice and compelling storytelling. While some note a tendency towards repetitive life-lesson messaging, this is often seen as reinforcing key principles like competence. The book’s power lies in its ability to connect with individuals seeking guidance and motivation, offering a fresh perspective on resilience and positive thinking. It’s a testament to Hadfield’s ability to translate extraordinary experiences into universally relatable insights.

The book’s lasting impact is evidenced by its continued relevance and positive reviews, even years after its initial release, solidifying its place as a modern guide to navigating life’s challenges.

Hadfield’s Influence on Personal Growth

Chris Hadfield’s approach, rooted in meticulous preparation and unwavering positivity, profoundly influences personal growth. His emphasis on competence – repeatedly highlighted as crucial – encourages readers to actively develop skills and embrace continuous learning. This isn’t merely about acquiring knowledge, but about building a foundation of self-reliance and capability.

The book inspires a proactive mindset, urging individuals to confront risk and uncertainty with a problem-solving attitude. Hadfield’s experiences demonstrate the power of maintaining a positive outlook even under immense pressure, a lesson readily applicable to everyday struggles. He models adaptability, showcasing how to adjust to unforeseen circumstances and learn from setbacks.

Ultimately, Hadfield’s influence extends beyond practical skills; he fosters a sense of empowerment and encourages readers to strive for self-improvement, not just for personal benefit, but for the betterment of humanity.

The Appeal of His Voice and Expertise

Chris Hadfield’s credibility as a former astronaut lends immense weight to his life advice. He doesn’t offer platitudes, but rather insights forged in the crucible of high-stakes environments. His voice, described as captivating, enhances the impact of his message, making complex concepts accessible and engaging.

Many readers suggest the book would be particularly impactful as an audiobook, allowing Hadfield’s expertise to flow naturally through his narration. This highlights the power of his delivery and the authenticity he brings to the material. He isn’t simply telling a story; he’s sharing a lived experience.

His dedication, passion, and achievements inspire admiration, making listeners and readers more receptive to his wisdom. The combination of his unique background and compelling communication style creates a powerful and lasting impression, fostering genuine connection and motivation.

palworld server settings guide

Palworld’s dedicated servers, available through Steam, enable private play with friends or global access, offering a customizable experience for up to thirty-two players.

Establishing a server allows for tailored gameplay, fostering communities and providing control over the Palworld experience, as Pocket Pair intends to expand server options.

Optimized performance and stability are crucial, and understanding server settings is key to a smooth, enjoyable Palworld adventure for you and your fellow Pals.

What is a Dedicated Palworld Server?

A dedicated Palworld server represents a self-hosted instance of the game, running independently of a player’s machine, offering a persistent world for you and your friends. Unlike joining a public server or relying on peer-to-peer connections, a dedicated server provides greater control and stability.

Essentially, it’s a virtual space where you dictate the rules, player limits (up to 32), and overall experience. Setting one up through Steam allows you to create a private haven for collaborative Pal catching and base building, or open it to the wider Palworld community.

This contrasts with simply playing with friends in a standard online session, as a dedicated server remains active even when the host isn’t playing, ensuring a consistent and accessible world. It’s a powerful tool for larger groups or those seeking a highly customized Palworld experience.

Furthermore, it allows for more reliable performance and reduces the strain on individual player computers.

Benefits of Hosting Your Own Server

Hosting your own Palworld server unlocks a wealth of advantages over public options, primarily centered around control and customization. You gain complete authority over the game world, including player access, rulesets, and difficulty settings, tailoring the experience to your preferences.

This control extends to the player limit, accommodating up to 32 individuals, far exceeding the four-player capacity of standard online play. A dedicated server also ensures consistent uptime, remaining active even when the host isn’t online, providing uninterrupted gameplay for your community.

Moreover, you bypass potential issues associated with lag or instability often found on public servers. You can also implement custom mods and configurations, further enhancing the Palworld experience. It’s ideal for building a close-knit community and fostering a unique gaming environment.

Ultimately, it’s about creating your Palworld.

Server Requirements & Considerations

Setting up a Palworld dedicated server demands careful consideration of hardware and network capabilities. While specific requirements aren’t definitively stated, a robust system is crucial for stable performance, especially with a maximum of 32 players.

Expect significant CPU and RAM usage; a powerful processor and ample memory (at least 16GB, potentially more) are highly recommended. A fast and reliable internet connection with sufficient bandwidth is also essential to minimize lag and ensure smooth connectivity for all players.

Furthermore, consider storage space, as server files and player data will accumulate over time. Port forwarding and firewall configuration are necessary steps to allow external connections to your server. Be prepared for a “fair amount” of technical setup, as it isn’t a simple process.

Prior planning prevents performance problems.

Server Setup & Configuration

Establishing a Palworld server involves downloading the dedicated server software from Steam, configuring the PalServerSettings.json file, and ensuring proper port forwarding and firewall adjustments.

Downloading and Installing the Dedicated Server

Initiating your Palworld server begins with downloading the dedicated server application directly through Steam. Within your Steam library, locate and download the “Palworld Dedicated Server” – it’s a separate entity from the standard game client.

Once downloaded, choose a suitable directory on your server machine to extract the server files. This location should have ample storage space, considering the game’s size and potential for future updates.

After extraction, you’ll find the essential server executable and configuration files. It’s crucial to verify the integrity of the downloaded files to prevent any runtime errors. Ensure your server meets the minimum system requirements outlined by Pocket Pair for optimal performance.

Finally, familiarize yourself with the server’s file structure, as you’ll be modifying configuration files in subsequent steps to tailor the server to your preferences.

Initial Server Configuration File (PalServerSettings.json)

The PalServerSettings.json file is the central hub for customizing your Palworld server. Located within the server’s installation directory, this file dictates core gameplay parameters, server behavior, and administrative controls.

Opening this file with a text editor reveals a wealth of configurable options. Key settings include server name, description, maximum player count (capped at 32), and the all-important admin password. Carefully set a strong admin password to secure your server.

Initial configuration should also address difficulty settings, such as Pal capture rate and drop rate multipliers. These values directly impact the challenge and reward structure of your server. Remember to save the file in UTF-8 format to avoid encoding issues.

Thoroughly reviewing and understanding each setting within the PalServerSettings;json file is crucial for creating a tailored Palworld experience.

Port Forwarding and Firewall Configuration

Establishing a Palworld server necessitates configuring port forwarding on your router and adjusting your firewall settings. Palworld utilizes specific ports for communication, and opening these ports allows players to connect to your server from outside your local network.

Typically, you’ll need to forward both UDP and TCP ports 8211. The exact process for port forwarding varies depending on your router’s manufacturer and model; consult your router’s documentation for detailed instructions.

Simultaneously, ensure your firewall (both Windows Firewall and any third-party firewalls) permits incoming and outgoing traffic on these ports. Failure to do so will prevent players from joining your server.

Proper port forwarding and firewall configuration are essential steps for a publicly accessible and smoothly functioning Palworld server.

Core Gameplay Settings

Palworld’s core settings allow customization of server name, player limits (up to 32), admin access, and difficulty, shaping the overall gameplay experience.

Server Name and Description

Setting a unique server name and description is fundamental for attracting players and defining your Palworld experience. The server name should be memorable and clearly indicate the server’s focus – whether it’s a casual, competitive, or role-playing environment.

The description field offers a valuable opportunity to elaborate on the server’s rules, community guidelines, and any unique features it offers. Clearly outlining expectations helps maintain a positive and enjoyable atmosphere for all players.

Consider including information about the server’s difficulty settings, PvP status, and any custom modifications or events. A well-crafted description can significantly impact player interest and encourage them to join your Palworld community. Don’t hesitate to be creative and showcase the personality of your server!

Remember, a compelling name and description are your server’s first impression, so make it count!

Maximum Player Count (Up to 32)

Palworld dedicated servers support a maximum of 32 concurrent players, offering a substantial multiplayer experience beyond the four-player limit of standard online play. Carefully consider your server’s hardware capabilities when determining the optimal player count.

While the server can accommodate 32 players, higher player counts demand more robust processing power and memory. Exceeding your server’s capacity can lead to performance issues like lag, instability, and connection problems.

Start with a lower player limit and gradually increase it as you monitor server performance. Finding the sweet spot ensures a smooth and enjoyable experience for everyone. Remember that each player contributes to resource usage, including CPU, RAM, and network bandwidth.

Properly configuring the maximum player count is crucial for maintaining server stability and preventing frustrating gameplay disruptions.

Admin Password and Permissions

Setting a robust admin password is paramount for securing your Palworld dedicated server. This password grants full control over server settings, player management, and overall administration. Choose a strong, unique password to prevent unauthorized access and potential disruptions.

Admin permissions allow you to manage players – including banning disruptive individuals – modify server configurations on-the-fly, and troubleshoot issues. Protecting this password is vital for maintaining a stable and enjoyable environment for all players.

Consider limiting access to the admin password to a trusted group of individuals. Regularly review and update the password as a preventative security measure. A compromised admin account could lead to server instability or malicious activity.

Proper admin control is essential for fostering a positive and well-managed Palworld community.

Difficulty Settings Customization

Palworld offers extensive customization of difficulty settings, allowing server administrators to tailor the experience to their players’ preferences. These settings impact various aspects of gameplay, from resource gathering to combat encounters, creating a uniquely challenging or forgiving world.

You can adjust base difficulty modifiers, influencing overall enemy strength and resource scarcity. Fine-tuning the Pal capture rate multiplier determines how easily Pals can be tamed, while the Pal drop rate multiplier affects the frequency of item drops from defeated creatures.

Experimenting with these settings is key to finding the perfect balance for your server. A higher capture rate might suit a casual player base, while increased difficulty could appeal to experienced Palworld adventurers.

Customization ensures a rewarding and engaging experience for everyone.

Base Difficulty Modifiers

Base difficulty modifiers in Palworld represent a core element of server customization, directly influencing the overall challenge presented to players. These modifiers impact enemy health, damage output, and the abundance of resources available throughout the game world.

Administrators can adjust these settings to create a more forgiving experience for newcomers or a brutally challenging environment for seasoned veterans. Increasing the modifier amplifies enemy strength and reduces resource availability, demanding strategic gameplay and efficient resource management.

Conversely, lowering the modifier eases the difficulty, allowing players to explore and progress with less resistance. Careful consideration of your player base is crucial when adjusting these fundamental settings.

Properly tuned base difficulty ensures a balanced and enjoyable Palworld experience for all.

Pal Capture Rate Multiplier

The Pal Capture Rate Multiplier is a pivotal server setting, directly controlling the probability of successfully capturing Pals in Palworld. This modifier allows administrators to fine-tune the challenge associated with building a robust Pal collection, impacting the overall gameplay loop.

A multiplier greater than 1.0 increases the capture rate, making it easier to acquire Pals, while a value less than 1.0 decreases the rate, demanding more strategic approaches and higher-quality Pal Spheres. This setting is particularly useful for balancing the game for different player skill levels.

Adjusting this multiplier can significantly alter the pace of progression, allowing for faster team building or a more rewarding, challenging experience. Consider your server’s intended playstyle when configuring this crucial parameter.

Careful calibration ensures a satisfying Pal-catching experience for all players.

Pal Drop Rate Multiplier

The Pal Drop Rate Multiplier within Palworld server settings governs the frequency with which Pals drop items upon defeat. This setting is crucial for controlling resource acquisition and influencing the economy within your server environment, directly impacting player progression.

A multiplier exceeding 1.0 boosts the drop rate, granting players more materials and potentially accelerating their advancement. Conversely, a value below 1.0 reduces drops, fostering a more resource-scarce and challenging experience, encouraging trade and cooperation.

Administrators can leverage this setting to tailor the game’s difficulty and reward structure, balancing the availability of essential crafting components and encouraging diverse gameplay strategies.

Strategic adjustment of this multiplier is key to maintaining a balanced and engaging server experience for all players.

Performance Optimization

Achieving optimal Palworld server performance requires careful adjustment of graphics settings, server tick rate, and resource allocation for a smooth experience.

Graphics Settings for High FPS

Optimizing graphics is vital for maintaining high frames per second (FPS) on a Palworld server, especially with numerous players and Pals. Lowering settings like shadows, effects quality, and volumetric fog significantly boosts performance.

Reducing texture quality can also yield substantial gains, though it may slightly impact visual fidelity. Disabling anti-aliasing or using a less demanding method, such as FXAA, is recommended. Experimenting with screen space reflections and post-processing effects can further improve FPS.

Prioritize performance over visual extravagance, particularly on servers with limited resources. A balance must be struck between visual appeal and smooth gameplay, ensuring a responsive experience for all players. Regularly monitor FPS and adjust settings accordingly to maintain optimal performance.

Consider resolution scaling as a last resort, but be aware of potential image quality degradation.

Server Tick Rate Adjustment

Adjusting the server tick rate directly impacts responsiveness and synchronization between players in Palworld. A higher tick rate (e.g., 60) means the server processes more updates per second, resulting in smoother gameplay and reduced latency.

However, increasing the tick rate also demands more processing power from the server. Lower tick rates (e.g., 30) reduce server load but can introduce noticeable lag and desynchronization, especially during intense action.

The optimal tick rate depends on your server’s hardware and the number of concurrent players. Start with a moderate value and monitor server performance. If the server can handle it, incrementally increase the tick rate until you reach a sweet spot between responsiveness and stability.

Carefully consider the trade-offs before making adjustments.

Memory Allocation and CPU Usage

Palworld dedicated servers are resource-intensive, demanding careful attention to memory allocation and CPU usage for optimal performance. Insufficient RAM can lead to frequent crashes and stuttering, while a weak CPU will bottleneck server processing, causing lag.

Allocate sufficient RAM – at least 8GB is recommended, but 16GB or more is preferable for larger player counts or heavily modded servers. Monitor CPU usage during peak gameplay; consistently high CPU utilization indicates a need for a more powerful processor.

Close unnecessary background processes on the server machine to free up resources. Regularly check server logs for memory leaks or CPU spikes, which can signal underlying issues requiring investigation.

Proper resource management is vital for a stable Palworld server.

Advanced Server Settings

Palworld’s advanced settings offer granular control, allowing customization of PvP, base building, player Pal limits, and day/night cycle speeds for unique experiences.

PvP Enable/Disable

Player versus player (PvP) combat in Palworld is a significant consideration when configuring a dedicated server, directly impacting the overall gameplay experience and community dynamics. The server settings allow administrators to completely enable or disable PvP interactions between players, offering flexibility to cater to different preferences.

Disabling PvP creates a cooperative environment focused on exploration, base building, and Pal collection, ideal for players who prefer a more relaxed and collaborative experience. Conversely, enabling PvP introduces an element of risk and reward, encouraging strategic gameplay and potentially fostering intense rivalries among players.

Administrators should carefully consider their community’s desires when making this decision. A server advertised as PvP-focused will attract players seeking competitive challenges, while a PvE-focused server will appeal to those prioritizing cooperation and peaceful progression. Proper communication regarding the PvP status is crucial for managing player expectations.

Base Building Restrictions

Palworld’s dedicated server settings offer administrators granular control over base building, allowing for restrictions that shape the server’s landscape and player interactions. These restrictions can range from limiting the number of structures players can place to defining specific zones where building is permitted or prohibited.

Implementing building restrictions can prevent excessive land claiming, ensuring fair access to resources and maintaining a visually appealing world. Administrators can also designate “safe zones” where building is restricted, protecting key areas or promoting specific gameplay styles.

Careful consideration is needed when setting these parameters. Overly restrictive settings can stifle creativity and hinder player progression, while lax restrictions can lead to cluttered landscapes and resource conflicts. Balancing freedom with order is key to fostering a thriving and enjoyable Palworld community.

Pal Limit Per Player

Palworld server administrators have the ability to regulate the number of Pals each player can own simultaneously, a crucial setting for maintaining server balance and preventing potential performance issues. This “Pal Limit” directly impacts gameplay, influencing a player’s strategic options and resource management.

A lower Pal limit encourages players to specialize and carefully consider which Pals to keep, fostering strategic team compositions. Conversely, a higher limit allows for greater flexibility but can strain server resources and potentially lead to hoarding.

Determining the optimal Pal limit requires careful consideration of the server’s hardware capabilities and the desired gameplay experience. Finding the right balance ensures a challenging yet enjoyable experience for all players within the Palworld ecosystem.

Day and Night Cycle Speed

Palworld’s dynamic day and night cycle significantly impacts gameplay, influencing Pal behavior, resource availability, and overall challenge. Server administrators can adjust the speed of this cycle, offering a customizable experience tailored to player preferences.

A faster cycle means more frequent shifts between day and night, potentially increasing the frequency of challenging nighttime encounters and altering resource gathering patterns. Conversely, a slower cycle extends daylight hours, providing more time for exploration and base building.

Adjusting this setting allows server owners to fine-tune the game’s pacing and create a unique atmosphere. Consider your player base’s playstyle when deciding on the optimal cycle speed for your Palworld server.

Troubleshooting & Common Issues

Palworld servers can experience crashes, connection problems, and performance lag; addressing these requires firewall checks, stability solutions, and optimization techniques for smooth gameplay.

Server Crashing and Stability

Palworld dedicated servers, while offering a fantastic experience, can sometimes suffer from instability leading to frustrating crashes. Several factors contribute to this, often stemming from insufficient system resources or conflicts within the server environment. Regularly monitoring server logs is crucial for identifying the root cause of crashes, as these logs often contain error messages pinpointing the issue.

Ensure your server meets the recommended specifications, particularly regarding RAM and CPU usage, as exceeding these limits can lead to instability. Updating the server software to the latest version is also vital, as Pocket Pair frequently releases patches addressing bugs and improving overall stability. Consider implementing a robust backup system to minimize data loss in the event of a catastrophic crash, allowing for quick restoration of your world.

Furthermore, excessive modding can introduce conflicts and instability; test new mods thoroughly before deploying them to a live server. Finally, maintaining a stable internet connection is paramount, as intermittent connectivity can also trigger server crashes.

Connection Problems and Firewall Issues

Palworld server connection issues are a common hurdle, often stemming from firewall configurations blocking necessary ports. Ensuring proper port forwarding is critical; the server requires specific ports to be open for players to connect successfully. Verify your router’s firewall settings and create rules allowing inbound and outbound traffic on these designated ports.

Additionally, Windows Firewall (or your operating system’s equivalent) must be configured to permit Palworld server traffic. Double-check that the server executable is added to the firewall’s allowed applications list. Network Address Translation (NAT) can also interfere with connections; consider using a static IP address for your server to improve reliability.

Players experiencing connection difficulties should verify their own firewall settings and ensure Palworld isn’t being blocked. Finally, investigate potential ISP restrictions or outages that might be impacting connectivity.

Performance Lag and Optimization Tips

Palworld server lag can significantly detract from the gameplay experience. Optimizing server performance requires a multi-faceted approach, starting with graphics settings. Lowering graphical fidelity, even on the server-side, can reduce CPU and GPU load, improving overall responsiveness. Adjusting the server tick rate is also crucial; a lower tick rate reduces server strain but may impact responsiveness.

Memory allocation plays a vital role; ensure the server has sufficient RAM allocated, but avoid over-allocation, which can lead to instability. Regularly monitor CPU and GPU usage to identify bottlenecks. Consider utilizing server-side mods designed to optimize performance, but exercise caution and ensure compatibility.

Finally, keep the server software updated, as Pocket Pair frequently releases performance enhancements.

Future Updates & Server Management

Pocket Pair plans ongoing server updates, while community tools are emerging to streamline Palworld server management, enhancing control and player experiences.

Expect continued improvements to stability, performance, and features, alongside growing support for server administrators and dedicated players.

Pocket Pair’s Server Update Plans

Pocket Pair has publicly acknowledged the importance of robust server infrastructure and is actively planning future updates to address current limitations and enhance the overall dedicated server experience for Palworld players.

These planned updates are expected to focus on improving server stability, reducing crashes, and optimizing performance to accommodate the growing player base and the demands of large-scale multiplayer sessions.

The developers are also considering implementing features requested by the community, such as more granular control over server settings, expanded administrative tools, and potentially, support for server-side mods.

Furthermore, Pocket Pair intends to continue monitoring server performance and gathering feedback from players to identify areas for improvement and prioritize future development efforts, ensuring a consistently evolving and optimized server environment.

Expect regular patches and updates aimed at refining the server experience and addressing any emerging issues, solidifying Palworld’s dedicated server platform.

Community Server Management Tools

While Pocket Pair focuses on core server updates, the Palworld community is rapidly developing a suite of third-party tools to aid in server management and enhance the player experience.

These tools range from automated server setup scripts and monitoring dashboards to advanced plugins that add new features and functionalities to dedicated servers, streamlining administrative tasks.

Popular options include utilities for managing player bans, automating routine maintenance tasks, and providing real-time server statistics, offering administrators greater control and visibility.

Community-created web interfaces are also emerging, allowing server owners to easily configure settings, manage players, and monitor server performance through a user-friendly graphical interface.

These tools empower server administrators to create customized Palworld experiences, fostering thriving communities and ensuring a smooth, enjoyable gameplay environment for all players.

season of discovery engineering guide

Season of Discovery Engineering Guide: An Overview

Season of Discovery introduces a revitalized engineering experience‚ blending classic crafting with innovative rune-based modifications. This guide explores the profession’s role‚
essential recipes‚ and strategic applications within this unique World of Warcraft era. Prepare to master gadgets and empower your adventures!

The yearly orbit of Earth and its axial tilt create distinct seasonal changes‚ influencing gameplay and resource availability. Understanding these cycles is crucial for efficient engineering.

Season of Discovery (SoD) dramatically reshapes the World of Warcraft landscape‚ introducing a fresh take on classic gameplay. This phase centers around uncovering hidden secrets and mastering rediscovered abilities‚ profoundly impacting all professions. Engineering‚ in particular‚ benefits from the introduction of rune engraving‚ allowing for unprecedented item customization and power.

The seasonal changes‚ driven by Earth’s orbit‚ influence resource gathering and strategic planning. Prepare for a dynamic experience where adaptation and ingenuity are key to success as an engineer!

The Role of Engineering in SoD

Engineering in Season of Discovery transcends its traditional support role‚ becoming a pivotal force in both PvE and PvP content. The ability to craft powerful gadgets‚ coupled with rune-enhanced modifications‚ provides unique advantages. Engineers can create utility items‚ combat enhancements‚ and even defensive mechanisms‚ impacting group dynamics and individual performance.

Understanding seasonal resource availability is crucial for efficient crafting. Mastering engineering unlocks a new layer of strategic depth‚ allowing players to adapt and thrive in this evolving world.

Engineering Professions & Specializations

Engineering offers diverse specializations‚ allowing players to focus on gadgetry‚ alchemy integration‚ or blacksmithing synergy. Choose a path aligning with your gameplay style and goals!

Choosing Your Engineering Specialization

Selecting an engineering specialization profoundly impacts your crafting capabilities within the Season of Discovery. Gadget-focused engineers excel at creating combat and utility devices‚ while those leaning towards alchemy integration unlock potent consumable enhancements. Blacksmithing synergy emphasizes weapon and armor modifications.

Consider your preferred playstyle – do you prioritize direct combat support‚ resourcefulness‚ or enhancing existing gear? Each path offers unique advantages‚ influencing your role in groups and solo adventures. Careful consideration ensures a rewarding and effective engineering journey.

Blacksmithing Synergy

Engineering and Blacksmithing demonstrate powerful synergy in the Season of Discovery. Engineers can craft specialized components that significantly enhance blacksmith-created weapons and armor. These modifications introduce unique properties‚ like increased damage or elemental resistances‚ unavailable through standard forging alone.

This collaboration allows for highly customized gear‚ tailored to specific encounters or playstyles. Mastering this synergy requires coordination and knowledge of both professions‚ unlocking potent equipment for personal use or trade.

Alchemy Integration

Engineering benefits greatly from integration with Alchemy in the Season of Discovery. Alchemists provide crucial potions and elixirs that enhance engineering devices‚ boosting their effectiveness or adding new functionalities. For example‚ potions can temporarily amplify gadget power or grant unique effects to crafted items.

Conversely‚ engineers can create specialized containers and delivery systems for alchemical concoctions‚ improving their usability and potency. This symbiotic relationship unlocks advanced crafting possibilities.

Key Engineering Recipes & Items

Engineering in the Season of Discovery offers a diverse range of gadgets‚ from early-level utility tools to powerful late-game devices‚ enhancing exploration and combat capabilities.

Early-Level Essential Gadgets

Early-level engineering focuses on providing adventurers with fundamental tools for survival and resource gathering. Key recipes include the Mining Pick‚ significantly boosting ore acquisition speed‚ and the Light Reflecting Wand‚ offering utility in exploration.

The Goblin Jumper Cables are invaluable for quickly returning to starting areas‚ while the Handful of Oil provides a simple‚ yet effective‚ combat advantage. These gadgets establish a solid foundation for further engineering progression.

Mid-Level Utility & Combat Items

Mid-level engineering unlocks powerful utility and combat options. The Gnomish Army Knife provides versatile tools‚ while the Bombing Run delivers area-of-effect damage‚ crucial for group content. Target Dummies aid in practicing rotations and testing damage output.

Electroshock Grenades offer crowd control‚ and the Mechanical Chicken provides a humorous‚ yet surprisingly effective‚ distraction. Mastering these items enhances both solo play and group effectiveness‚ preparing engineers for end-game challenges.

Late-Game Powerful Devices

High-level engineering unveils truly potent devices. The Goblin Rocket Fuel significantly boosts movement speed‚ vital for raid encounters. Transdimensional Teleporters offer strategic positioning advantages‚ while Shrink Flasks provide unique tactical options.

Mind Control Hats‚ though whimsical‚ can disrupt enemy formations. Mastering these advanced gadgets‚ combined with rune enhancements‚ elevates engineers to indispensable roles within challenging Season of Discovery content‚ maximizing raid and dungeon success.

Rune Engraving & Its Impact

Rune engraving fundamentally alters engineering‚ imbuing gadgets with new properties. Strategic rune application unlocks powerful modifications‚ enhancing item functionality and creating unique builds.

Understanding Rune Applications

Rune application in Season of Discovery isn’t merely cosmetic; it’s transformative. These ancient symbols‚ carefully etched onto crafted items‚ bestow entirely new effects‚ altering base functionality.
Experimentation is key‚ as rune combinations dictate the final outcome. Consider the item’s purpose – combat‚ utility‚ or support – when selecting runes.

Different runes offer varied enhancements‚ from stat boosts to entirely new abilities. Mastering this system requires understanding rune properties and synergistic pairings. Careful planning maximizes the potential of your engineering creations.

Optimal Rune Combinations for Engineers

Engineers thrive on adaptability‚ and rune combinations reflect this. For potent combat gadgets‚ pairing a damage-enhancing rune with one that increases critical strike chance is ideal. Utility items benefit from runes boosting duration or reducing cooldowns.

Defensive mechanisms shine with runes granting temporary invulnerability or reflecting damage; Remember‚ experimentation is vital! Discovering unique synergies tailored to your playstyle unlocks the true potential of Season of Discovery’s rune system.

Resource Gathering for Engineering

Engineering demands diverse resources! Ore locations are vital‚ alongside diligent herb and cloth acquisition. Seasonal changes impact availability‚ demanding adaptable gathering strategies for success.

Essential Ore Locations

Iron and Copper are abundant in early zones like Elwynn Forest and Dun Morogh‚ crucial for initial crafting. Silver and Gold veins populate Redridge Mountains and Wetlands‚ supporting mid-level recipes. For Thorium‚ venture into Burning Steppes and Searing Gorge. Remember‚ resource nodes are affected by seasonal changes‚ potentially shifting their concentrations and availability throughout the year. Efficient gathering requires knowledge of these dynamic patterns and adapting your routes accordingly.

Herb & Cloth Acquisition

Gromsblood and Swiftthistle are readily found in starting areas‚ vital for early alchemy synergies. Briarthorn and Fadeleaf grow in mid-level zones like Redridge Mountains‚ supporting more complex recipes. Linen Cloth drops from humanoids‚ while Silk Cloth comes from spiders – efficient farming routes are key; Seasonal changes impact herb spawns; adapt your gathering based on the time of year for optimal yields.

Engineering Leveling Guide

Leveling efficiently involves crafting numerous early-level gadgets‚ focusing on repeatable recipes. Prioritize quests offering engineering skill-ups and maximize XP gains through consistent crafting!

Efficient Leveling Strategies (1-200)

Early levels (1-50) focus on readily available materials; crafting Bronze Bombs and Simple Spring-Loaded Gauntlets provides consistent gains. Levels 50-100 benefit from Whistles and Gnomish Army Knives‚ utilizing common ores.

Mid-level (100-150) introduces more complex items like Heavy Blast Oil and Targeting Mirrors. Levels 150-200 demand strategic resource gathering for Goblin Rocket Boots and Thorium Spring Rigger‚ maximizing skill-ups and preparing for advanced crafting.

Maximizing XP Gains

Daily Quests offered by engineering trainers provide substantial experience. Prioritize crafting items with high material costs‚ as these yield greater skill-up rewards. Utilize Engineering’s unique gadgets – Teleporters and Speed Boosters – to efficiently gather resources and complete quests.

Focus on crafting items in demand on the Auction House; the profit gained can fund further leveling. Remember that seasonal changes impact resource availability‚ so adapt your crafting strategy accordingly for optimal XP gains.

Engineering PvP Applications

Engineering provides potent PvP tools! Utilize combat gadgets like bombs and grenades for offensive pressure‚ alongside defensive mechanisms to disrupt opponents and control the battlefield.

Combat Gadgets & Their Uses

Engineering’s arsenal boasts diverse combat gadgets crucial for PvP dominance. Bombs deliver area-of-effect damage‚ disrupting enemy formations and forcing movement. Grenades offer targeted bursts‚ ideal for finishing weakened foes. Rocket Boots provide momentary speed boosts for quick engagements or escapes.

Goblin Jumper Cables can incapacitate opponents‚ while Discombobulators inflict confusion. Strategically deploying these devices requires understanding their range‚ cooldowns‚ and optimal timing to maximize impact during skirmishes and battleground encounters.

Defensive Mechanisms

Engineering provides vital defensive tools for survival in Season of Discovery’s challenging landscapes. Gnomish Army Knife offers versatile utility‚ including repair capabilities and minor health restoration. Smoke Bombs create concealing screens‚ allowing for tactical retreats or ambushes. Reflective Cloaks briefly deflect incoming damage‚ mitigating burst attacks.

Titansteel Stabilizers enhance armor‚ bolstering resilience against physical threats. Mastering these defensive mechanisms is paramount for enduring prolonged engagements and navigating dangerous environments‚ ensuring survival against formidable foes.

Engineering in Raids & Dungeons

Engineering offers raid support through Goblin Jumper Cables and utility items like Lockpicking Sets. Dungeon exploration benefits from Khaz’gorite Steam Boots for mobility and strategic advantages.

Support Items for Raid Groups

Engineers provide invaluable raid support with specialized gadgets. Goblin Jumper Cables offer emergency resurrection‚ crucial during challenging encounters. Heavy Runecloth Bandages provide significant healing over time‚ supplementing healers. Dynamite can be strategically used for AoE damage or triggering environmental effects. Furthermore‚ Engineering crafted elixirs and consumables enhance raid performance‚ offering temporary stat boosts and utility. Mastering these items elevates an engineer’s value within a raid group‚ ensuring success against formidable foes.

Utility for Dungeon Exploration

Engineering excels at providing dungeon exploration tools. Gnomish Army Knife offers versatile solutions‚ from lockpicking to minor repairs. Night Vision Goggles illuminate dark passages‚ revealing hidden dangers. Tracking Devices locate elusive targets or mark patrol routes. Bomb usage can bypass obstacles or initiate advantageous encounters. These gadgets enhance survivability and efficiency‚ allowing engineers to navigate treacherous dungeons with confidence and uncover valuable treasures.

Professions Synergies

Engineering thrives with complementary professions. Mining provides essential ores‚ while Herbalism yields crucial components for potent alchemy integrations and gadget enhancements.

Engineering and Mining

Mining is arguably the most vital synergy for Engineers in Season of Discovery. Access to diverse ores – from early-game copper and tin to late-game thorium – directly fuels crafting capabilities. Consistent ore acquisition ensures a steady supply for gadgets‚ devices‚ and rune-infused creations.

Efficient miners can significantly reduce crafting costs and unlock advanced recipes sooner. Prioritizing Mining alongside Engineering creates self-sufficiency and a competitive edge‚ maximizing potential within the game’s evolving landscape.

Engineering and Herbalism

Herbalism complements Engineering by providing essential alchemical components used in various crafting recipes. Many potent potions and elixirs require herbs‚ which are then integrated into specialized Engineering devices‚ enhancing their functionality or creating unique effects.

This synergy allows Engineers to create self-sufficient builds‚ reducing reliance on external markets. Mastering both professions unlocks powerful combinations‚ offering a distinct advantage in both PvE and PvP scenarios throughout Season of Discovery.

Season of Discovery Engineering Changes

Season of Discovery introduces modified recipes and entirely new Engineering creations. Existing items receive adjustments‚ while rune-engraving unlocks unprecedented customization and power.

New Recipes and Modifications

Season of Discovery dramatically expands Engineering’s recipe list‚ offering innovative gadgets and utility items previously unavailable. Modifications to existing schematics enhance functionality‚ often incorporating rune-based enhancements for unique effects. Expect altered crafting requirements‚ demanding strategic resource gathering. These changes encourage experimentation and adaptation‚ pushing Engineers to explore new possibilities. Discovering these recipes often involves unique quests and exploration‚ rewarding dedicated crafters with powerful tools. The seasonal changes influence material availability‚ impacting crafting efficiency.

Adjustments to Existing Items

Season of Discovery doesn’t just add new Engineering creations; it refines existing ones. Many familiar gadgets receive stat boosts‚ improved durability‚ or altered functionalities. These adjustments ensure older recipes remain relevant in the evolving landscape. The core mechanics of established items are often tweaked‚ creating new strategic applications. Rune integration further modifies these items‚ adding customizable effects. Expect familiar tools to feel fresh and impactful‚ offering viable options alongside newly discovered schematics.

Engineering Reputation Rewards

Engineering factions offer exclusive rewards‚ including schematics for powerful devices and unique cosmetic items. Building reputation unlocks access to specialized runes and crafting materials.

Gaining Reputation with Engineering Factions

Reputation is primarily earned by completing daily quests offered by various engineering-focused groups throughout the game world. Turning in crafted items‚ particularly those utilizing newly discovered runes‚ also provides substantial gains. Participating in faction-specific events and assisting their members with unique challenges further accelerates progress.

Remember that consistent effort and strategic quest selection are key to unlocking the most valuable rewards quickly. Prioritize quests offering the highest reputation yield for optimal results!

Exclusive Rewards

Engineering factions offer a diverse array of rewards‚ including unique schematics for powerful gadgets‚ rare runes enhancing item capabilities‚ and cosmetic items showcasing your dedication. High-level reputation unlocks access to specialized tools‚ improving crafting efficiency and unlocking previously inaccessible recipes.

Furthermore‚ expect exclusive mounts and pets‚ demonstrating mastery of the profession. These rewards are essential for maximizing your engineering potential in Season of Discovery!

Troubleshooting Common Engineering Issues

Recipe acquisition can be problematic; check vendors and ensure sufficient faction standing. Item crafting failures often stem from low skill or missing reagents – double-check everything!

Recipe Acquisition Problems

Engineers frequently encounter difficulties obtaining crucial Season of Discovery recipes. Many schematics are vendor-exclusive‚ requiring specific reputation levels with engineering factions. Others drop from creatures or are rewards from quests‚ demanding diligent farming. Remember to check all relevant vendors regularly‚ as stock can rotate.

Furthermore‚ some recipes are learned through discovery – experimenting with different materials. Utilize online resources and community guides to pinpoint elusive schematics and streamline your acquisition process. Don’t overlook the Auction House!

Item Crafting Failures

Engineering in Season of Discovery isn’t always smooth sailing; crafting failures are common‚ especially with complex devices. These failures often stem from insufficient skill‚ missing reagents‚ or simply bad luck. While skill increases success rates‚ failures can still occur.

Consider utilizing crafting bonuses from enchants or gear. Remember that repeated attempts can eventually yield success. Don’t be discouraged – persistence is key! Community resources often share tips for minimizing failure rates for specific recipes.

Future of Engineering in SoD

Engineering’s future hinges on community feedback and potential updates. Expect new recipes‚ modifications‚ and adjustments to existing items‚ continually evolving the profession’s power and utility.

Potential Updates and Additions

Future updates could introduce entirely new gadget categories‚ expanding beyond current utility and combat options. Rune interactions might become more complex‚ allowing for deeper customization and synergistic effects. We anticipate additions to resource gathering‚ potentially linking engineering more closely with mining and herbalism.

Furthermore‚ expect modifications to existing schematics‚ balancing power levels and addressing community concerns. The developers may also explore unique seasonal engineering projects‚ tied to in-game events and offering exclusive rewards. These changes aim to solidify engineering as a vital profession.

Community Feedback & Expectations

Players overwhelmingly desire more impactful PvP gadgets and robust raid utility from engineering. A common request is increased accessibility to rare schematics‚ reducing reliance on luck. Many hope for deeper integration with other professions‚ creating synergistic crafting loops.

Expectations also include regular balance adjustments to prevent power creep and maintain a diverse meta. The community actively seeks creative rune combinations and innovative gadget designs. Addressing these concerns will be crucial for engineering’s long-term success.

brooks brothers pants fit guide

Brooks Brothers Pants Fit Guide: A Comprehensive Overview (Updated 11/26/2025)

Brooks Brothers offers diverse fits – Milano, Clark, Hudson, and Thompson – alongside newer options like Soho and NEAT collaborations, ensuring a tailored experience for every customer.

Brooks Brothers has a storied history, evolving from a ready-to-wear pioneer to a modern style authority. For over two centuries, they’ve outfitted generations with quality garments, and their pants are central to this legacy. Initially known for traditional styles, Brooks Brothers now balances classic tailoring with contemporary fits.

Their range caters to diverse preferences, from the slim Milano to the relaxed Hudson. Understanding their fit philosophy is key to navigating the options. Recent collaborations, like the one with NEAT, demonstrate a commitment to innovation. Whether you seek classic chinos or refined wool trousers, Brooks Brothers provides a foundation for a well-dressed wardrobe.

Understanding Brooks Brothers Fit Philosophy

Brooks Brothers’ fit philosophy centers on providing options for a range of body types and style preferences. They’ve moved beyond a single “classic” fit, embracing slimmer silhouettes like Milano and Soho alongside more relaxed options like Hudson and traditional Thompson styles.

The brand aims to offer a precise fit, acknowledging that personal preference is paramount. They emphasize the importance of understanding rise, taper, and inseam. Recent collaborations, such as with NEAT, reflect a modern approach to fit, blending traditional craftsmanship with contemporary aesthetics. Ultimately, Brooks Brothers seeks to empower customers to find pants that feel and look their best.

Core Fit Categories

Brooks Brothers categorizes its pants fits into four core styles: Milano, Clark, Hudson, and Thompson. Milano offers a slim silhouette, ideal for a modern look. The Clark fit provides a classic, regular cut, remaining a popular choice. For relaxed comfort, the Hudson fit sits at the waist with a more generous cut.

Finally, the Thompson fit embodies a traditional style, featuring a pleated front. Beyond these, the slimmer Soho fit and collaborations like the NEAT partnership expand the range, offering even more specialized options to suit diverse preferences and body types.

Milano Fit: The Slim Silhouette

The Milano Fit from Brooks Brothers is designed for a contemporary, streamlined appearance. These pants feature a plain front and a notably slim fit throughout the leg, creating a modern aesthetic. They are a popular choice for those seeking a more tailored and fashionable look.

Ideal for individuals who prefer a closer-fitting trouser, the Milano fit complements a variety of styles. It’s a versatile option, suitable for both casual and more formal occasions, offering a sophisticated and polished silhouette. Consider this fit for a sharp, updated wardrobe.

Clark Fit: The Classic Regular Fit

The Clark Fit represents Brooks Brothers’ traditional regular fit, offering a comfortable and timeless style. These trousers feature a plain front and provide ample room through the seat and thigh, ensuring ease of movement. It’s a versatile choice for those who prioritize comfort without sacrificing a polished appearance.

This classic silhouette is a staple in many wardrobes, suitable for a wide range of body types and occasions. The Clark Fit provides a balanced look, neither too tight nor too loose, making it a reliable and enduring option for everyday wear and more formal settings.

Hudson Fit: Relaxed Comfort

The Hudson Fit from Brooks Brothers prioritizes relaxed comfort, offering a more generous cut than the Milano or Clark fits. These trousers feature a plain front and are designed to sit at the waist, providing a comfortable and easy feel throughout the day. They offer ample room in the seat and thigh, ideal for those seeking a less restrictive style.

This fit is perfect for casual occasions or for individuals who prefer a looser silhouette. The Hudson provides a classic, understated look that’s both comfortable and stylish, making it a versatile addition to any wardrobe.

Thompson Fit: Traditional Pleated Style

The Thompson Fit embodies a classic, traditional aesthetic with its defining pleated front. This style offers a more substantial and comfortable fit, providing extra room in the waist and seat. Brooks Brothers’ Thompson trousers typically have a higher rise, sitting at or slightly above the natural waistline, offering a timeless silhouette.

Ideal for those who appreciate a more formal or classic look, the Thompson Fit pairs well with both sport coats and dress shirts. The pleats add a touch of sophistication and allow for greater ease of movement, making it a comfortable yet refined choice.

Detailed Fit Breakdown

Understanding the nuances of Brooks Brothers’ pant fits requires a closer look at key elements. Waist height and rise significantly impact comfort and silhouette, ranging from mid-rise to higher-waisted options. Leg opening and tapering define the overall shape – slim, straight, or relaxed – influencing how the trousers drape.

Inseam lengths are crucial for a proper break, and alterations are often necessary for a personalized fit. These details, combined with fabric choices, create distinct styles. Careful consideration of these elements ensures a polished and comfortable appearance.

Waist Height & Rise Variations

Brooks Brothers pants showcase varying waist heights and rises, impacting both comfort and style. Lower rises create a modern, streamlined look, sitting on the hips, while mid-rise options offer a balanced approach, suitable for many body types. Higher rises, reminiscent of traditional tailoring, sit at or above the natural waist, providing a more formal and secure fit.

The rise influences how the pants drape and interact with the torso. Choosing the correct rise is essential for achieving a flattering silhouette and ensuring all-day comfort, complementing individual preferences and body proportions.

Leg Opening & Tapering Explained

Brooks Brothers offers a spectrum of leg openings and tapering styles to suit diverse preferences. A straight leg provides a classic, timeless silhouette, while a tapered leg gradually narrows from the thigh to the ankle, creating a more modern and streamlined appearance. Wider leg openings offer a relaxed, comfortable fit, often seen in their Hudson fit.

The degree of taper impacts the overall aesthetic; subtle tapering maintains a balanced look, while more pronounced tapering emphasizes a slimmer profile. Consider shoe styles when selecting a leg opening – wider openings pair well with bulkier shoes, while tapered legs complement sleeker footwear.

Inseam Lengths & Alterations

Brooks Brothers typically offers a range of inseam lengths, catering to varying heights. Common options include 30″, 32″, 34″, and 36″, though availability may vary by style. Proper inseam length ensures your pants drape correctly, avoiding bunching or appearing too short.

Alterations are readily available at Brooks Brothers stores, allowing for a customized fit. Hemming is the most common alteration, adjusting the inseam to your precise measurement. Consider your shoe height when determining the ideal inseam – wear the shoes you’ll typically pair with the pants during your fitting for accurate results.

Fabric & Construction Impact on Fit

Brooks Brothers utilizes various fabrics, each influencing the pant’s fit and feel. Cotton chinos offer a more relaxed drape, while wool trousers generally provide a structured, sharper silhouette. Stretch fabrics, increasingly common, enhance comfort and allow for closer-fitting styles without restricting movement.

Construction details also matter. Lined trousers tend to hold their shape better, while unlined options are lighter and more breathable. The weight of the fabric impacts how the pants fall – heavier fabrics offer more structure, while lighter ones are more fluid.

Cotton Chinos & Their Fit Characteristics

Brooks Brothers’ cotton chinos are renowned for versatility and comfort, available across multiple fits. Milano chinos offer a modern, slim leg, ideal for a streamlined look. Clark chinos provide a classic, regular fit, suiting a broader range of body types. Hudson chinos deliver relaxed comfort with a more generous cut, sitting at the waist.

Chino fabric’s inherent drape means they generally offer more give than wool trousers. This allows for comfortable wear across different fits, but also means they may wrinkle more easily. Proper sizing is crucial for achieving the desired silhouette;

Wool Trousers & Fit Considerations

Brooks Brothers’ wool trousers typically maintain a more structured silhouette compared to chinos. The Milano fit in wool offers a sharp, contemporary aesthetic, while the Clark fit provides a balanced, classic appearance. Thompson, with its pleated front, offers a traditional, fuller cut. Wool’s natural properties mean fit is paramount; alterations are often necessary for a perfect drape.

Consider the weight of the wool – lighter weights drape more easily, while heavier weights hold their shape better. Wool trousers generally require more precise tailoring for optimal comfort and style.

Stretch Fabrics & Modern Fits

Brooks Brothers increasingly incorporates stretch fabrics into their trouser offerings, blending traditional style with modern comfort. These fabrics allow for a closer fit without sacrificing mobility, enhancing silhouettes like the Milano and Soho. Stretch chinos and wool blends provide a more forgiving fit, ideal for those seeking a streamlined yet comfortable look.

The addition of stretch often allows for a more versatile fit, bridging the gap between classic and contemporary styles. Consider stretch options when prioritizing all-day wearability and a modern aesthetic.

Comparing Fits for Different Body Types

Brooks Brothers’ varied fits cater to diverse physiques. Athletic builds often benefit from the Milano or Soho fits, showcasing muscle tone without appearing overly tight. Slimmer builds can also excel in the Milano, while the Clark fit provides a balanced look.

For larger builds, the Hudson fit offers relaxed comfort and a flattering silhouette. The Thompson fit, with its pleats, provides room and a classic aesthetic. Ultimately, prioritizing comfort and proportional balance is key when selecting the ideal fit.

Best Fits for Athletic Builds

Brooks Brothers offers several excellent choices for athletic builds. The Milano fit, known for its slim silhouette, effectively showcases muscular legs without constriction. Alternatively, the even slimmer Soho fit provides a modern, streamlined appearance.

These fits complement an athletic physique by following the body’s natural lines. However, ensuring adequate room in the thigh area is crucial for comfort and mobility. Consider a slight stretch fabric for enhanced movement, maintaining a polished and proportional look.

Best Fits for Slimmer Builds

Brooks Brothers presents options for those with slimmer builds, focusing on maintaining proportion and avoiding a boxy appearance. The Milano fit, with its tailored silhouette, is a strong contender, offering a modern and streamlined look. The Soho fit, being the slimmest, can also work well, but careful consideration of the thigh fit is essential.

Avoid overly relaxed fits like the Hudson, which may overwhelm a slimmer frame. Opting for a classic rise and a moderate taper can create a balanced and flattering silhouette, enhancing the overall aesthetic.

Best Fits for Larger Builds

Brooks Brothers caters to larger builds with fits designed for comfort and a flattering silhouette. The Clark fit, a classic regular fit, provides ample room without appearing overly baggy. The Hudson fit, offering a relaxed feel, is another excellent choice, prioritizing comfort and ease of movement.

Avoid excessively slim fits like Milano or Soho, as they may restrict movement and appear disproportionate. Consider a mid-rise to ensure a comfortable fit around the waist, and pay attention to the leg opening for a balanced look.

Brooks Brothers Collaborations & Newer Fits

Brooks Brothers continually evolves its offerings through exciting collaborations, most notably with NEAT, a brand specializing in trousers. This partnership introduces a modern take on classic silhouettes, blending Brooks Brothers’ heritage with NEAT’s contemporary design sensibility.

These collaborations often feature unique fits and fabrications, expanding beyond the core Milano, Clark, Hudson, and Thompson options. Expect innovative cuts and a focus on refined details, appealing to a customer seeking a fresh perspective on traditional menswear. These newer fits represent a dynamic shift in the brand’s style evolution.

NEAT Collaboration: A Modern Take

The Brooks Brothers and NEAT collaboration signifies a compelling fusion of American tradition and Italian tailoring expertise. NEAT, renowned for its meticulously crafted trousers, brings a distinctly modern aesthetic to Brooks Brothers’ classic repertoire. This partnership focuses on refined silhouettes and premium materials, offering a sophisticated alternative to conventional fits;

Expect trousers with a focus on natural shaping and comfortable wearability, deviating from overly structured styles. The collaboration emphasizes quality construction and subtle detailing, appealing to customers who appreciate understated elegance and a contemporary approach to menswear. It’s a fresh perspective on timeless style.

Finding Your Perfect Fit: Measurement Guide

Achieving the ideal Brooks Brothers pant fit begins with accurate measurements. Start by measuring your waist at its natural point, ensuring the tape measure is comfortably snug, not tight. For inseam, measure from the crotch to where you’d like the trousers to fall on your shoe.

Don’t overlook hip and thigh measurements, as these significantly impact comfort and silhouette, especially in slimmer fits. Consider professional alterations for a truly customized fit; Brooks Brothers pants are generally amenable to tailoring. Refer to their size charts, but prioritize personal measurements for optimal results.

Waist & Inseam Measurement Instructions

To measure your waist accurately, stand naturally and place the tape measure around your natural waistline – typically just above your hip bones. Ensure the tape is level and comfortably snug, avoiding constriction. Don’t suck in your stomach! For inseam, the most accurate method requires a friend.

Measure from your crotch down the inside of your leg to where you want the pant hem to rest on your shoe. If measuring alone, use well-fitting pants as a guide. Record both measurements in inches for precise Brooks Brothers sizing.

Hip & Thigh Measurement Considerations

Accurate hip measurement is crucial for a comfortable fit, especially with slimmer fits like Milano or Soho. Measure around the fullest part of your hips and buttocks, keeping the tape measure level. For thigh measurements, measure around the fullest part of your thigh, approximately 4-6 inches above your knee.

These measurements help determine the appropriate rise and cut of the pants. Larger builds may prioritize a higher rise and more room in the thigh, while athletic builds might prefer a closer, tapered fit. Consider these factors when selecting your Brooks Brothers pants.

Brooks Brothers Pants Fit FAQs

Can Brooks Brothers pants be altered? Yes, alterations are readily available to achieve a perfect fit. What is the difference between Soho and Milano fit? Soho is the slimmest, while Milano offers a more tailored, yet less restrictive, silhouette.

Where to buy Brooks Brothers pants? You can purchase them online at BrooksBrothers.com, in their retail stores, and through select department store partners like Nordstrom. Remember to consult the fit guide and consider professional measurements for optimal results. Don’t hesitate to reach out to their customer service for assistance!

Can Brooks Brothers pants be altered?

Brooks Brothers absolutely offers alteration services to ensure a precise and comfortable fit for your trousers. Common alterations include adjusting the waist, tapering the legs, and hemming the inseam. They recommend utilizing their in-store tailoring experts for the best results, guaranteeing quality workmanship.

However, alterations may vary depending on the style and fabric of the pants. Certain highly constructed trousers might have limited alteration options. It’s always best to consult with a tailor before purchasing to confirm feasibility and associated costs.

What is the difference between Soho and Milano fit?

Brooks Brothers’ Soho fit represents their slimmest trouser option, offering a modern, streamlined silhouette throughout the leg. In contrast, the Milano fit provides a slimmer profile but isn’t quite as tapered as the Soho.

Milano pants generally have a more classic, tailored look, while Soho leans towards a contemporary, fashion-forward aesthetic. Both are plain front, but Soho is designed for a closer, more body-conscious fit, making it ideal for those seeking a very trim appearance.

Where to buy Brooks Brothers pants?

Brooks Brothers pants are readily available through several convenient channels. You can purchase directly from their official website, www.brooksbrothers.com, offering the widest selection and exclusive styles.

Additionally, Brooks Brothers operates numerous retail stores across the United States and internationally. Department stores like Nordstrom and Nordstrom Rack also carry a selection of Brooks Brothers trousers, often at discounted prices. Online retailers may also offer options, but verifying authenticity is crucial when purchasing from third-party sellers.

atwood rv water heater troubleshooting guide

This guide provides essential steps for diagnosing and resolving issues with your Atwood RV water heater, ensuring optimal performance and safety. Refer to the manual for detailed instructions.

Overview of the Atwood RV Water Heater

The Atwood RV water heater is a popular choice for recreational vehicles, offering reliable hot water solutions. Known for its durability and efficiency, it is designed to withstand the demands of RV travel. The unit typically features a 6-gallon capacity and operates using propane, ensuring consistent performance even off-grid. With a focus on safety and convenience, the Atwood RV water heater includes temperature control and a robust design to minimize leaks and damage. Its compact size makes it ideal for RV installations, providing ample hot water for showers, dishes, and other needs. This model is widely regarded for its reliability and ease of maintenance.

Importance of Regular Maintenance

Regular maintenance is crucial for extending the lifespan and efficiency of your Atwood RV water heater. Neglecting routine checks can lead to premature wear, leaks, and even safety hazards. By following a maintenance schedule, you ensure optimal performance, prevent costly repairs, and maintain water quality. Simple tasks like inspecting connections, checking for corrosion, and cleaning the unit can significantly reduce the risk of issues. A well-maintained water heater also enhances safety by preventing gas leaks and electrical malfunctions. Consistent upkeep ensures your RV water heater operates reliably, providing hot water when needed, especially during extended trips or off-grid adventures.

Common Issues and Solutions

Common issues with Atwood RV water heaters include the unit not turning on, inconsistent water temperature, and leaks. If the heater doesn’t start, check the power supply and ensure the circuit breaker isn’t tripped. For temperature issues, verify thermostat settings and inspect the heating element. Leaks often stem from loose connections or damaged seals, which can be tightened or replaced. Strange noises may indicate sediment buildup, requiring a flush. Always refer to the manual for specific solutions and safety guidelines. Addressing these problems promptly prevents further damage and ensures reliable hot water supply during your RV adventures.

Pre-Troubleshooting Checks

Before troubleshooting, ensure the Atwood RV water heater is installed correctly and refer to the manual for guidance. Check power supply, thermostat settings, and look for error lights or leaks. Always turn off the heater before performing any checks to ensure safety and accurate diagnosis.

Understanding the Atwood RV Water Heater Manual

The Atwood RV Water Heater Manual is a comprehensive guide designed to help users understand and maintain their water heater effectively. It includes detailed instructions for installation, operation, and troubleshooting, ensuring safe and efficient use. The manual also provides a wiring diagram specific to the 6-gallon model, making it easier to diagnose electrical issues. Regular maintenance schedules and safety precautions are highlighted to prevent common problems. By familiarizing yourself with the manual, you can identify error codes, understand thermostat settings, and perform routine checks to keep your water heater functioning optimally. Refer to it regularly to address any concerns promptly and correctly.

Essential Tools and Materials Needed

Before starting any troubleshooting or maintenance on your Atwood RV water heater, gather essential tools and materials to ensure efficiency and safety. A multimeter is crucial for diagnosing electrical issues, while adjustable wrenches and screwdrivers are necessary for accessing internal components. Safety gear, such as gloves and goggles, protects you from potential hazards. A drain pan and water hose are useful for draining the tank, and a replacement parts kit can save time if repairs are needed. Having these tools and materials ready allows you to address issues promptly and effectively, minimizing downtime and ensuring your water heater operates smoothly.

Safety Precautions Before Starting

Before troubleshooting your Atwood RV water heater, ensure your safety by following essential precautions. Always turn off the power supply and gas valve to prevent accidental ignition or electrical shocks. Drain the water heater tank to avoid scalding from hot water. Wear protective gloves and goggles to shield yourself from potential hazards. Ensure the area is well-ventilated to prevent gas buildup. Never smoke or use open flames near the water heater. Keep a fire extinguisher nearby and be aware of emergency shutdown procedures. Familiarize yourself with the unit’s components and their locations to avoid unintended damage or exposure to harmful elements.

Installation and Initial Setup

Refer to the Atwood RV Water Heater Manual for a step-by-step installation guide and initial setup process to ensure smooth operation and prevent future issues.

Step-by-Step Installation Guide

Begin by preparing the installation site, ensuring it is level and well-ventilated. Mount the Atwood RV water heater securely, following the manual’s specifications. Connect the water inlet and outlet lines, ensuring they are tightly sealed to prevent leaks. Next, attach the gas line and electrical connections, referring to the wiring diagram for accuracy. Double-check all connections for tightness and proper alignment. Finally, power on the unit and test its operation by running hot water through the faucets to ensure everything functions correctly. Always follow the manufacturer’s instructions for a safe and successful installation.

Wiring Diagram for Atwood RV Water Heater

The wiring diagram for your Atwood RV water heater is a critical tool for understanding the electrical connections. It outlines the power supply, thermostat, and circuit breaker connections. Locate the diagram in your manual or online. Ensure all wires are connected according to the diagram, with the ground wire properly attached. Verify that the circuit breaker is appropriately sized. If you notice any discrepancies, consult a professional. Always follow the manufacturer’s guidelines to avoid electrical hazards. This diagram is essential for troubleshooting and ensuring your water heater operates safely and efficiently. Refer to it during installation or repairs for accurate connections.

Initial Start-Up and Testing

Before operating your Atwood RV water heater, ensure all connections are secure and the system is properly installed. Follow the manual’s start-up procedure to avoid issues. Turn on the power and gas supply, then check for leaks in water and gas lines. Set the thermostat to your desired temperature and allow the heater to cycle. Test the system by running hot water through a faucet to ensure it’s functioning correctly. Monitor the temperature and pressure relief valve for proper operation. If you encounter any issues, refer to the troubleshooting section of your manual or consult a professional. Proper start-up ensures safety and efficiency. Always follow the manufacturer’s guidelines for initial testing.

Troubleshooting Common Problems

This section provides step-by-step solutions for common issues with your Atwood RV water heater, helping you identify and resolve problems efficiently. Refer to your manual for detailed guidance.

Water Heater Not Turning On

If your Atwood RV water heater fails to turn on, start by checking the power supply and ensuring all switches are in the correct position. Verify that the circuit breaker hasn’t tripped and that the water heater is properly connected to a power source. Next, inspect the thermostat settings to ensure it’s not set too low. If using gas, check that the gas valve is fully open and the pilot light is lit. Refer to the wiring diagram in your manual to identify any potential electrical issues. If the problem persists, consult the troubleshooting section of your Atwood RV water heater manual for specific guidance.

Issues with Water Temperature

If your Atwood RV water heater is producing water that’s too hot or too cold, start by checking the thermostat settings. Ensure it’s set within a safe range (typically 120-140°F). If the issue persists, inspect the heating element for damage or mineral buildup, which can affect performance. Verify that the temperature and pressure relief valve is functioning correctly and not leaking. Check for any blockages in the water lines or heat exchanger, as restricted flow can disrupt temperature regulation. Refer to your manual for guidance on adjusting settings or replacing faulty components. Always prioritize safety when handling electrical or gas components of your water heater.

Leaking or Water Damage

Leaking or water damage in your Atwood RV water heater can lead to serious issues if left unaddressed. Start by identifying the source of the leak, which could be from loose connections, faulty valves, or cracks in the tank. Turn off the power and water supply immediately to prevent further damage. Inspect the drain pan for water accumulation and ensure proper ventilation to avoid moisture buildup. Check for rust or corrosion on metal components, as these can weaken over time. Clean or replace damaged parts as needed. If the leak persists, consult a professional to avoid costly repairs or potential safety hazards. Regular inspections can help prevent such issues from arising.

Unusual Noises or Vibrations

Unusual noises or vibrations from your Atwood RV water heater can indicate underlying issues. Common causes include loose connections, sediment buildup, or faulty heating elements. Start by turning off the power and inspecting the unit. Check for loose pipes or mounting brackets, as these can cause vibrations. If you hear banging or clanking sounds, it may be due to sediment accumulation at the bottom of the tank. Draining and flushing the tank can resolve this. Additionally, a malfunctioning thermostat or faulty temperature and pressure relief valve could cause unusual noises. Addressing these issues promptly can prevent further damage and ensure safe operation. Regular maintenance is key to avoiding such problems.

Error Codes and Their Meanings

Atwood RV water heaters may display error codes to indicate specific issues. For example, an “E1” code often signifies a temperature sensor malfunction, while “E2” could point to a heating element failure. Understanding these codes is crucial for quick troubleshooting. Refer to your manual for a comprehensive list of codes and their meanings. If you encounter an error, start by verifying the code’s definition and following the recommended steps. In some cases, resetting the unit or replacing a faulty component may resolve the issue. Always ensure the power is off before attempting any repairs. Consulting a professional is advised if the problem persists. Regular checks can help prevent errors from occurring.

Maintenance and Repair Tips

Regular maintenance ensures optimal performance and longevity of your Atwood RV water heater. Clean the unit, inspect elements, and address leaks promptly to prevent major repairs.

Regular Maintenance Schedule

Regular maintenance is crucial for extending the life of your Atwood RV water heater. Start by inspecting the anode rod every 6 months to prevent corrosion. Replace it if more than 50% is eroded. Check the temperature and pressure relief valve monthly to ensure proper function. Drain and flush the tank annually to remove sediment buildup, which can reduce efficiency. Inspect the heating element for mineral deposits and clean or replace it as needed. Additionally, check all connections and seals for leaks. Refer to your manual for specific guidelines tailored to your model. A consistent schedule ensures reliable performance and safety.

Deep Cleaning the Water Heater

Deep cleaning your Atwood RV water heater involves draining the tank and removing sediment. Start by turning off the power and water supply. Attach a hose to the drain valve and direct water to a safe area. Once drained, use a water heater cleaning kit to flush out debris. For tough buildup, soak the tank with a descaling solution before rinsing thoroughly. Reassemble and refill the tank, then check for leaks. Regular deep cleaning prevents mineral buildup, improves efficiency, and prolongs the heater’s lifespan. Always follow safety guidelines and refer to your manual for specific instructions.

Replacing Parts and When to Do It

Replacing parts in your Atwood RV water heater is essential for maintaining its performance and longevity. Common parts to replace include the anode rod, heating elements, and temperature-pressure relief valve. The anode rod should be inspected annually and replaced if severely corroded to prevent tank damage. Heating elements may need replacement if they fail to heat water properly. Always turn off power and water supply before starting any replacement. Use genuine Atwood parts to ensure compatibility and safety. Refer to your manual for specific instructions and recommended maintenance schedules. Regular part replacement can prevent costly repairs and ensure reliable hot water supply during your RV adventures.

Safety and Emergency Procedures

Ensure safety by disconnecting power and gas, shutting off water supply, and ventilating the area. Follow emergency shutdown procedures and consult the manual for detailed guidance.

General Safety Guidelines

Always follow the Atwood RV water heater manual instructions to ensure safe operation. Before troubleshooting, disconnect power and gas supply, and shut off the water supply. Ensure proper ventilation in the area to prevent gas buildup. Never smoke or use open flames near the heater. Regularly inspect for leaks or damage. Keep the surrounding area clear of flammable materials. If unsure about any procedure, consult a professional. Adhere to these guidelines to maintain safety and prevent accidents during troubleshooting or maintenance. Proper precautions will help ensure efficient and safe operation of your Atwood RV water heater.

Handling Gas and Electrical Components Safely

When working with your Atwood RV water heater, always prioritize safety. Before handling gas or electrical components, turn off the power supply and ensure the gas valve is closed. Use a gas leak detector to check for any leaks, and never ignite or spark near the heater. Avoid using damaged tools, as they may cause electrical shocks or further damage. Properly ground electrical connections to prevent hazards. Ensure the area is well-ventilated to avoid gas accumulation. If unsure about any procedure, consult a licensed technician. Always follow the manufacturer’s guidelines for safe handling of gas and electrical parts to prevent accidents and ensure reliable operation.

Emergency Shutdown Procedures

In case of an emergency, such as a gas leak, electrical malfunction, or overheating, follow these steps to safely shut down your Atwood RV water heater. First, immediately turn off the power supply at the circuit breaker or switch. Next, close the gas valve to prevent any further gas flow. Open windows and doors to ventilate the area thoroughly. Do not attempt to restart the heater until the issue is resolved. If you smell gas, evacuate the area and contact a professional. Always refer to your manual for specific emergency procedures. Remember, safety should never be compromised when dealing with gas and electrical systems.

Conclusion and Additional Resources

This guide provides comprehensive troubleshooting tips for your Atwood RV water heater. For further assistance, refer to the official Atwood manual or visit their support website.

Final Tips for Optimal Performance

Regular maintenance is key to ensuring your Atwood RV water heater operates efficiently. Always check for leaks, ensure proper ventilation, and refer to the manual for specific guidelines. Monitoring temperature settings and performing annual inspections can prevent major issues. By following these tips, you can extend the lifespan of your water heater and enjoy consistent hot water supply during your RV adventures. Remember, proper care and timely repairs are essential for optimal performance and safety.

Recommended Resources for Further Reading

For comprehensive guidance, refer to the official Atwood RV Water Heater Manual, which covers installation, maintenance, and troubleshooting. Additionally, online forums and RV communities often share valuable insights and solutions from experienced users. YouTube tutorials and manufacturer support pages provide visual and step-by-step instructions for common issues. Regularly updated resources ensure you stay informed about the latest troubleshooting techniques and safety protocols. Always prioritize official documentation and trusted sources to maintain your water heater’s performance and longevity.

big island hawaii guide book

The Big Island of Hawaii, often called the largest Hawaiian island, is a paradise of natural wonders and rich culture. Hawaii The Big Island Revealed, by Andrew Doughty, is a top-rated guidebook offering comprehensive insights into attractions, history, and cultural experiences, making it a must-have for visitors.

Overview of the Big Island

The Big Island of Hawaii, the largest in the Hawaiian archipelago, is a land of contrasts, featuring lush rainforests, black sand beaches, and active volcanoes like Kilauea. Its diverse landscapes and microclimates create a unique environment that supports a wide variety of ecosystems. From the snow-capped peaks of Mauna Kea to the tropical waters of the Pacific, the island offers endless opportunities for exploration. With a rich cultural heritage and modern amenities, the Big Island attracts adventurers, nature lovers, and those seeking a relaxing getaway. Guidebooks like Hawaii The Big Island Revealed provide detailed insights into its hidden gems, ensuring visitors make the most of their trip. The island’s size and diversity make it a destination that caters to all interests and preferences.

Best Guidebooks for the Big Island

When planning a trip to the Big Island, a reliable guidebook is essential for uncovering its hidden gems and making the most of your visit. Hawaii The Big Island Revealed by Andrew Doughty is widely regarded as the gold standard, offering candid, humorous, and detailed insights into the island’s attractions, history, and culture. Another excellent option is the Big Island of Hawaii Travel Guide (Full-Color) 2025-2026, which provides a comprehensive overview of the island’s stunning beaches, volcanoes, and outdoor activities. For a more personalized approach, the Big Island Guide is a complete travel companion, covering where to stay, eat, and explore. These guidebooks are invaluable resources for first-time visitors and seasoned travelers alike, ensuring an unforgettable adventure on the Big Island.

Geography and Climate of the Big Island

The Big Island is Hawaii’s largest island, larger than all others combined. Its diverse landscape features active volcanoes like Kilauea and varied climates from tropical to alpine.

Size and Landscape of the Big Island

The Big Island of Hawaii is the largest island in the Hawaiian archipelago, surpassing the combined size of all other islands. Its vast landscape is incredibly diverse, featuring active volcanoes like Kilauea, black sand beaches, lush rainforests, and even snow-capped mountains like Mauna Kea. The island’s terrain ranges from tropical coastal areas to arid deserts and high-altitude alpine climates. This unique diversity creates a dynamic environment that supports a wide variety of ecosystems. The Big Island’s sheer size and geological activity contribute to its ever-changing landscape, making it a fascinating destination for exploration. From volcanic landscapes to pristine beaches, the island’s natural beauty is unparalleled, offering endless opportunities to discover its breathtaking wonders.

Volcanoes and Their Impact on the Island

The Big Island is home to some of the most active and iconic volcanoes in the world, including Kilauea, which has been erupting intermittently since 1983. These volcanic formations have shaped the island’s landscape, creating black sand beaches, lava tubes, and unique geological features. The continuous volcanic activity not only adds new land to the island but also supports rare ecosystems that thrive in the volcanic soil. Mauna Kea, a dormant volcano, stands as the tallest mountain in Hawaii, reaching over 13,800 feet above sea level. Volcanoes are central to the island’s identity, influencing both its natural beauty and cultural heritage, making them a focal point for scientific study and tourist exploration alike. Their presence underscores the dynamic and ever-evolving nature of the Big Island.

History and Culture of the Big Island

The Big Island is a melting pot of ancient Hawaiian traditions and modern cultural influences, offering a rich tapestry of historical sites, royal palaces, and sacred temples.

Ancient Hawaiian History and Traditions

The Big Island is steeped in ancient Hawaiian history, with a spiritual connection to the land and sea. Early Hawaiians lived in harmony with nature, guided by the kapu system, a strict code of conduct. Sacred temples, or heiau, like those at Puʻuhonua o Hōnaunau, reflect their deep spiritual beliefs. The island was divided into ahupuaʻa, sustainable land divisions that supported communities. Chiefs, or aliʻi, ruled with wisdom, ensuring balance and prosperity. These traditions, passed down through generations, highlight the resilience and wisdom of Hawaii’s ancestors, leaving a lasting legacy celebrated today through cultural practices and historical sites.

Modern History and Cultural Significance

The Big Island’s modern history reflects a blend of cultural evolution and environmental stewardship. Following Hawaii’s statehood in 1959, the island experienced growth in tourism and agriculture, shaping its economy. Ranching traditions, introduced in the 19th century, continue to thrive, offering a glimpse into the island’s cowboy heritage. The active volcanoes, Kilauea and Mauna Loa, have captivated scientists and visitors alike, while their eruptions have reshaped the land. Today, the Big Island is a mosaic of Native Hawaiian traditions, modern innovation, and ecological preservation. Cultural sites like Puʻuhonua o Hōnaunau and the Hawaii Volcanoes National Park highlight the island’s historical and natural significance, making it a unique destination for exploration and cultural immersion. The balance between tradition and modernization defines the Big Island’s enduring charm.

Must-Visit Attractions on the Big Island

The Big Island captivates visitors with its iconic landmarks, including the mesmerizing Kilauea volcano, the towering summit of Mauna Kea, and the breathtaking Akaka Falls. Explore the stunning black sand beaches and vibrant marine life, making it a paradise for nature enthusiasts and adventure seekers.

Natural Wonders: Beaches, Volcanoes, and Waterfalls

The Big Island is a haven of natural beauty, featuring iconic volcanoes, stunning beaches, and breathtaking waterfalls. Kilauea, one of the world’s most active volcanoes, mesmerizes visitors with its lava flows and fiery eruptions. The towering Mauna Kea, a dormant volcano, rises 13,800 feet above sea level, offering stargazing opportunities like no other. The island’s waterfalls, such as the 442-foot Akaka Falls, are surrounded by lush tropical landscapes, creating a serene atmosphere. Beaches like Punalu’u Black Sand Beach and Hapuna Beach showcase the island’s diverse shoreline, from black volcanic sands to pristine white beaches. Snorkeling spots and vibrant marine life further enhance the island’s natural allure, making it a paradise for outdoor enthusiasts and nature lovers alike.

Historical and Cultural Landmarks

The Big Island is rich in historical and cultural landmarks that reflect Hawaii’s deep heritage. One of the most significant sites is Pu’uhonua o Hōnaunau, a historic park preserving ancient Hawaiian temples, fishponds, and royal grounds. This sacred place once served as a refuge for those seeking forgiveness. Another notable landmark is Kaloko-Honokōhau National Historical Park, which features petroglyphs, fishponds, and ancient Hawaiian settlements. The Huliheʻe Palace in Kailua-Kona, a nineteenth-century royal residence, offers insights into Hawaii’s monarchic past. These landmarks provide a glimpse into the island’s vibrant history, cultural traditions, and the resilience of its people; Visiting these sites is essential for understanding the spiritual and historical essence of the Big Island.

Outdoor Activities on the Big Island

The Big Island offers a wide range of outdoor adventures, from snorkeling in vibrant waters to hiking through lush rainforests and exploring active volcanoes.

Beaches and Snorkeling Spots

The Big Island is renowned for its stunning beaches and exceptional snorkeling opportunities. From the white sand beaches of Kona to the black sand shores of Punalu’u, the island offers diverse coastal experiences. Snorkeling spots like Kealakekua Bay, a marine sanctuary, and Two Step at Pu’uhonua o Hōnaunau, are perfect for exploring vibrant coral reefs and tropical fish. The crystal-clear waters of Hapuna Beach and Mauna Kea Beach provide ideal conditions for swimming and snorkeling. For adventure seekers, night snorkeling with manta rays near Kona is a unique experience. With numerous tide pools and hidden coves, the Big Island’s beaches and snorkeling spots are a paradise for ocean lovers. Hawaii The Big Island Revealed guidebook offers detailed insights to help visitors discover these natural gems.

Hiking Trails and National Parks

The Big Island boasts an array of hiking trails and national parks that showcase its diverse landscapes. Hawaii Volcanoes National Park is a must-visit, featuring Kilauea, one of the world’s most active volcanoes, and Mauna Loa, the largest volcano on Earth. Hikers can explore lava tubes, steam vents, and the Halemaumau crater. The park’s unique terrain, including rainforests and black sand beaches, offers unforgettable experiences. For stargazing enthusiasts, Mauna Kea’s summit, at 13,800 feet, provides breathtaking views of the night sky. Trails like the Mauna Loa Observatory Trail and the Waipi’o Valley Trail offer challenging yet rewarding adventures. Hawaii The Big Island Revealed guidebook provides detailed maps and insights to help visitors navigate these incredible natural wonders.

Water Sports and Wildlife Exploration

The Big Island is a paradise for water sports and wildlife enthusiasts. Snorkeling and diving are popular in the crystal-clear waters of Kealakekua Bay, where vibrant marine life thrives. Kayaking and paddleboarding are great ways to explore the island’s rugged coastline. For adventure seekers, spotting dolphins and whales in their natural habitat is a memorable experience. The Hawaii The Big Island Revealed guidebook recommends the best spots for these activities, ensuring an unforgettable journey. With its diverse marine ecosystems, the Big Island offers endless opportunities to connect with nature and wildlife. Grab your gear, dive in, and discover the underwater wonders of this Hawaiian gem.

Where to Stay on the Big Island

From luxury resorts to cozy vacation rentals, the Big Island offers diverse accommodations. Hawaii The Big Island Revealed and Big Island Travel Guide provide top recommendations for hotels, resorts, and rentals in Kona, Hilo, and beyond, ensuring a perfect stay.

Accommodation Options: Hotels, Resorts, and Rentals

The Big Island offers a wide range of accommodations to suit every traveler’s needs. From luxury resorts like those in Kona to cozy vacation rentals in Hilo, there’s something for everyone. Hawaii The Big Island Revealed and Big Island Travel Guide recommend top-rated hotels, many of which feature stunning ocean views, pools, and spa services. For a more private experience, vacation rentals provide fully equipped kitchens and spacious living areas, ideal for families or long-term stays. Budget-friendly options, such as charming bed-and-breakfasts, are also available, offering a unique, personalized experience. Whether you prefer modern amenities or a rustic retreat, the Big Island’s diverse lodging options ensure a comfortable and memorable stay.

Best Areas to Stay: Kona, Hilo, and Beyond

The Big Island offers diverse regions to stay, each with its own charm. Kona, on the west coast, is known for its sunny weather, stunning beaches, and vibrant nightlife, making it ideal for families and adventure seekers. Hilo, on the east coast, is a quieter, lush area perfect for nature lovers and those seeking a more laid-back atmosphere. For a mix of luxury and seclusion, areas like Waimea and Puna offer unique experiences, from ranch-style stays to eco-friendly retreats. Guidebooks like Hawaii The Big Island Revealed and Big Island Travel Guide highlight these regions, ensuring travelers find the perfect spot to match their preferences and explore the island’s diverse landscapes.

Dining on the Big Island

The Big Island offers a rich culinary experience with local Hawaiian cuisine and unique specialties. Guidebooks like Hawaii The Big Island Revealed recommend top dining spots.

Local Cuisine and Hawaiian Specialties

The Big Island is a culinary gem, offering a diverse array of local Hawaiian specialties. Traditional dishes like poke, lau lau, and kalua pig showcase the islands’ rich cultural heritage. Fresh seafood, tropical fruits, and locally grown ingredients such as pineapples and macadamia nuts are staples. Guidebooks highlight the importance of trying haupia, a coconut milk dessert, and shave ice, a sweet Hawaiian treat. The unique fusion of Native Hawaiian, Asian, and American flavors creates a distinct culinary experience. Visitors can explore these specialties at local restaurants, food trucks, and markets recommended in guidebooks like Hawaii The Big Island Revealed, ensuring an authentic taste of the islands’ vibrant culture and cuisine.

Top Restaurants and Dining Experiences

The Big Island offers a vibrant culinary scene, with restaurants that showcase the islands’ fresh, locally sourced ingredients. From beachside eateries to fine dining establishments, visitors can enjoy a wide range of flavors. Guidebooks like Hawaii The Big Island Revealed highlight top-rated spots, such as farm-to-table restaurants and traditional Hawaiian eateries. Fresh seafood, including poke and sushi, is a staple, while innovative fusion dishes blend Hawaiian, Asian, and American cuisines. Don’t miss the opportunity to experience authentic luau feasts, which offer a taste of Hawaiian culture alongside live music and dance. Whether you’re seeking casual bites or gourmet meals, the Big Island’s dining scene promises unforgettable flavors and memorable experiences.

Shopping on the Big Island

The Big Island offers a variety of unique shopping experiences, from boutique stores to local markets. Find Hawaiian crafts, artwork, and souvenirs like koa wood items and orchid lei jewelry. Visit charming shops in Kona and Hilo for authentic island treasures that reflect the islands’ rich culture and natural beauty.

Local Markets and Craft Fairs

The Big Island is home to vibrant local markets and craft fairs that showcase the islands unique culture and creativity. The Hilo Farmers Market, held every weekend, offers fresh produce, handmade crafts, and local specialties like Hawaiian coffee and macadamia nuts. Similarly, the Kona Inn Shopping Village features boutique shops and artisans selling everything from wood carvings to tropical clothing. These markets are perfect for finding authentic souvenirs and supporting local businesses. Visitors can also explore craft fairs during festivals, where artisans display intricate jewelry, woven fabrics, and traditional Hawaiian items. These gatherings provide a glimpse into the islands rich heritage and offer a chance to take home a piece of Hawaii’s unique spirit.

Best Places for Souvenirs and Unique Finds

The Big Island offers a variety of unique souvenir spots where visitors can find authentic Hawaiian treasures. From handmade crafts to tropical-inspired gifts, these shops and boutiques provide memorable keepsakes. Hilo Farmers Market and Kona Inn Shopping Village are top destinations for local goods, featuring items like Hawaiian coffee, macadamia nuts, and handcrafted jewelry. Artisan villages and beachfront shops also offer one-of-a-kind finds, such as recycled glass sculptures and Hawaiian quilts. For a truly unique experience, explore the boutique stores in resort areas, where you can discover exclusive island designs and artwork. These shops are perfect for finding gifts or mementos that capture the essence of the Big Island’s culture and beauty.

Events and Festivals on the Big Island

The Big Island hosts vibrant annual festivals celebrating Hawaiian culture, music, and traditions. From hula competitions to food festivals, these events showcase the island’s rich heritage and aloha spirit.

Annual Festivals and Cultural Celebrations

The Big Island is alive with vibrant annual festivals and cultural celebrations that highlight its rich Hawaiian heritage. One of the most iconic events is the Merrie Monarch Festival, a week-long celebration of traditional hula dance, music, and art. Held in Hilo, it attracts visitors worldwide to experience the deep-rooted traditions of Hawaii. Another standout is the Kona Coffee Cultural Festival, honoring the island’s coffee traditions with tastings, farm tours, and live entertainment. Additionally, the Big Island Film Festival showcases local and international cinema, while Lei Day celebrations in May highlight the art of lei making. These events offer a unique glimpse into the island’s culture, history, and community spirit, making them a must-experience for visitors.

Local Events and Community Gatherings

The Big Island is known for its lively local events and community gatherings, which reflect the island’s strong sense of aloha and connection. From bustling farmers’ markets like the Hilo Farmers Market to outdoor concerts and art walks, there’s always something to explore. Many communities host weekly or monthly events, such as beach cleanups, outdoor yoga sessions, and cultural workshops. These gatherings provide a chance to meet locals, learn about island traditions, and enjoy the island’s natural beauty. Additionally, small-town festivals celebrating everything from local harvests to handmade crafts bring people together, fostering a sense of community and connection. These events are a great way to experience the authentic spirit of the Big Island and its residents.

Travel Tips for the Big Island

Planning your trip to the Big Island? Pack lightweight clothing, sunscreen, and sturdy shoes for outdoor adventures. Check guidebooks like Hawaii The Big Island Revealed for insider tips on navigating the island, including transportation options and must-visit spots.

Planning Your Trip: When to Go and What to Pack

The best time to visit the Big Island is during the dry season, from September to November or April to June, when weather conditions are ideal. Pack lightweight, breathable clothing, reef-safe sunscreen, and sturdy shoes for hiking. Don’t forget a water bottle and a light jacket for cooler evenings at higher elevations. Check guidebooks like Hawaii The Big Island Revealed for detailed itineraries and tips on navigating the island. Stay informed about volcanic activity, especially around Kilauea and Mauna Loa, as conditions can change. Plan ahead and use reliable resources to ensure a smooth and memorable trip to this stunning island.

Transportation and Getting Around the Island

Renting a car is essential for exploring the Big Island, as public transportation is limited. Major rental companies are available at Kona International Airport (KOA) and Hilo International Airport (ITO). A 4WD vehicle is recommended for accessing remote areas like Waipio Valley. Guidebooks like Hawaii The Big Island Revealed suggest comparing prices and booking in advance, especially during peak seasons. Taxis, rideshares, and airport shuttles are also available but can be costly. For those not renting a car, some resorts offer shuttle services, but flexibility is limited. Plan your transportation ahead to make the most of your trip and enjoy the island’s diverse landscapes and attractions seamlessly.

Safety Tips and Essential Precautions

When exploring the Big Island, prioritize safety to ensure a enjoyable trip. According to guidebooks like Hawaii The Big Island Revealed, be mindful of strong ocean currents and only swim at lifeguarded beaches. Volcanic areas require caution; stay on designated trails and follow park guidelines, especially near active sites like Kilauea. Protect yourself from the sun with reef-safe sunscreen, hats, and hydration. Respect sacred Hawaiian sites and private property. Stay informed about weather conditions, as sudden rainstorms can affect hiking and driving. Always carry a reliable map or GPS, as cell service can be limited in remote areas. By taking these precautions, you can safely experience the island’s natural beauty and cultural richness.

The Big Island of Hawaii offers a diverse landscape, rich culture, and unforgettable experiences. With the right guidebook, visitors can explore its stunning beaches, volcanoes, and hidden gems effortlessly.

Final Thoughts on Visiting the Big Island

The Big Island of Hawaii is a destination that captivates with its sheer diversity, from sprawling landscapes to vibrant culture. A trusted guidebook like Hawaii The Big Island Revealed is indispensable for uncovering hidden gems and maximizing your experience. Whether exploring volcanic wonders, snorkeling in crystal-clear waters, or immersing in local traditions, the island promises unforgettable moments. Plan thoughtfully, pack appropriately, and embrace the spirit of aloha. With the right insights, your journey will be a seamless blend of adventure, relaxation, and cultural enrichment. Let the guidebook be your compass as you discover why the Big Island remains a timeless favorite among travelers.

Key Takeaways for an Unforgettable Trip

To ensure an unforgettable journey to the Big Island, prioritize planning with a trusted guidebook like Hawaii The Big Island Revealed. This essential resource offers insider tips on attractions, dining, and cultural experiences. Pack accordingly, considering the island’s diverse climates, from beachwear to light jackets for cooler elevations. Rent a reliable vehicle to explore remote areas, and stay informed about volcanic activity for safety. Immerse yourself in local traditions and respect Hawaii’s natural environments. With careful preparation and the right guidance, your trip will be a seamless blend of adventure, relaxation, and cultural enrichment. Let your guidebook be your roadmap to discovering the island’s hidden gems and creating lasting memories.

5k guide oregon

Oregon’s 5K running scene is vibrant‚ offering diverse training programs like IntroRun-5K and TRAIL Half Marathon. With coached sessions in Portland and charity races‚ runners enjoy scenic routes and supportive communities‚ making Oregon a top destination for 5K enthusiasts at all levels.

Overview of Popular 5K Races in Oregon

Oregon hosts a variety of popular 5K races that cater to runners of all levels. The Heaven Can Wait 5K in Central Oregon is a standout event‚ supporting the breast cancer community and attracting over 1‚200 participants. In Portland‚ the Run for the Trees 5K‚ organized by Oregon Parks Forever‚ combines racing with environmental advocacy. The Oregon Brewery Running Series offers a fun mix of racing and craft beer‚ while the Bend Marathon Training Plans include 5K options for those building up to longer distances. Charity-focused races like the Peru 331 5K Training I emphasize speed and road race preparation. With scenic trails‚ urban routes‚ and competitive atmospheres‚ Oregon’s 5K races provide diverse experiences for runners. These events often include coached training programs‚ making them accessible to both newcomers and experienced athletes. Whether for charity‚ personal challenge‚ or community engagement‚ Oregon’s 5K scene has something for everyone.

Why Oregon is a Great Place for 5K Training

Oregon is an ideal location for 5K training due to its diverse and scenic landscapes‚ offering runners a variety of routes from urban paths to trail runs. The state’s mild climate‚ with cool winters and temperate summers‚ provides optimal conditions for year-round training. Additionally‚ Oregon’s strong running community‚ with numerous clubs and coached group sessions‚ fosters a supportive environment for athletes at all levels. The availability of structured training programs‚ such as the 12-week plans designed for both beginners and experienced runners‚ ensures that participants receive professional guidance. Furthermore‚ the proximity to nature‚ with trails like those in the Columbia River Gorge‚ enhances the training experience by providing challenging and picturesque routes. Overall‚ Oregon’s combination of natural beauty‚ community support‚ and comprehensive training resources makes it a prime location for 5K preparation.

Training Programs for 5K in Oregon

Oregon offers structured 5K training programs‚ including IntroRun-5K and trail options‚ with coached sessions in Portland and virtual guidance through TrainingPeaks‚ catering to all runner levels.

Structured 12-Week Training Plans for Beginners

Oregon’s 12-week training plans are perfect for beginners‚ offering a gradual approach to build endurance and confidence. These programs start with a mix of walking and jogging‚ progressing to consistent running. Weekly coached sessions‚ often held on Saturdays at 8:00 AM‚ provide guidance and motivation. Coaches also send weekly emails with tips and advice to keep participants on track. The plans are designed to target late October or early November races‚ ensuring a clear goal for trainees. Many programs include additional benefits like team shirts and discounts for participants. With certified coaches and supportive mentorship‚ these structured plans help new runners transition from walking to running a full 5K. The focus is on consistency and gradual improvement‚ making it accessible for those new to running. These plans are a great way to build a strong foundation and prepare for race day with confidence.

Advanced Training Programs for Experienced Runners

Oregon offers advanced training programs designed for experienced runners looking to enhance speed‚ endurance‚ and race performance. These programs are tailored for those with an established running base‚ focusing on interval training‚ tempo runs‚ and hill repeats. Coached sessions in Portland provide expert guidance‚ while virtual coaching options allow runners across Oregon to benefit from personalized plans. Programs like PERU 331 5K Training I cater to runners seeking to improve their race times and prepare for competitive events. Many advanced plans incorporate strength training and nutrition advice to optimize performance. With access to scenic trails and road routes‚ Oregon’s advanced programs help experienced runners refine their skills and achieve new personal bests. These structured plans ensure runners stay challenged and motivated‚ whether training for a local 5K or a larger competitive race.

Coached Group Training Sessions in Portland

Portland offers exceptional coached group training sessions tailored for runners of all levels. These structured programs provide weekly workouts led by certified coaches‚ focusing on improving speed‚ endurance‚ and technique. Many sessions are held on Saturday mornings at 8:00 AM‚ offering a consistent routine for participants. Coaches provide guidance through weekly emails‚ ensuring runners stay on track with their training goals. Programs often include team shirts and exclusive discounts‚ fostering a sense of community and motivation. Whether you’re training for a 5K‚ 10K‚ or beyond‚ Portland’s coached groups create a supportive environment to help runners achieve their best performance. The combination of expert coaching‚ scenic routes‚ and camaraderie makes these sessions a cornerstone of Oregon’s thriving running culture.

Virtual Coaching Options for Remote Runners

Oregon-based coaches offer virtual coaching options‚ providing flexible training solutions for runners who prefer remote guidance. Through platforms like TrainingPeaks‚ runners can access customized 5K training plans tailored to their fitness level and goals. These plans include structured workouts‚ pacing strategies‚ and nutrition advice. Virtual coaching programs often cater to both beginners and advanced runners‚ with options like the PERU 331 5K Training I‚ designed to enhance speed and endurance. Coaches provide weekly feedback and support‚ ensuring runners stay motivated and on track. Virtual coaching also allows runners to connect with Oregon’s running community remotely‚ offering a sense of belonging and accountability. Whether you’re training for a road race or trail event‚ virtual coaching brings expert guidance to your doorstep‚ helping you prepare effectively for your next 5K. This approach combines flexibility with professional oversight‚ making it ideal for those who value convenience and personalized attention.

Preparing for Your First 5K

Build a strong foundation with Oregon’s structured 12-week training plans‚ focusing on weekly workouts‚ proper form‚ and recovery. Certified coaches guide beginners‚ ensuring a confident start to their 5K journey.

Building a Running Base for Beginners

Building a running base is essential for beginners preparing for their first 5K. Start with short‚ manageable runs and incorporate walk breaks to gradually increase endurance; Oregon’s 12-week training programs‚ designed for beginners‚ focus on progressive overload‚ ensuring a steady improvement in stamina and speed. Consistency is key‚ so aim for 3-4 runs per week‚ with at least one day of rest or cross-training. Proper hydration‚ nutrition‚ and recovery are also vital to avoid injury and support progress. Beginner-friendly routes in Oregon‚ such as Portland’s Waterfront or Bend’s trails‚ provide scenic and motivating environments; Joining local running groups or following structured plans through apps like TrainingPeaks can help stay accountable and track progress. Remember‚ building a strong foundation takes time‚ so prioritize patience and celebrate small milestones along the way.

Importance of Proper Running Form and Technique

Proper running form and technique are crucial for maximizing performance and preventing injuries. Oregon-based coaches emphasize posture‚ foot strike‚ and breathing to ensure efficiency. A midfoot or forefoot strike‚ rather than heel striking‚ reduces injury risk. Keeping the torso upright and engaging the core improves balance and energy use. Practice deep‚ rhythmic breathing to maintain oxygen flow. In Portland‚ runners can access expert coaching and group sessions to refine their form. Virtual coaching options also provide personalized feedback for remote runners. Consistent focus on technique enhances endurance and speed‚ making it easier to progress in training. Oregon’s supportive running community and accessible resources make it an ideal place to develop and maintain proper running mechanics; Prioritizing form ensures a safer and more enjoyable journey to completing a 5K.

Weekly Workout Plans for Consistent Progress

A well-structured weekly workout plan is essential for consistent progress in 5K training. Oregon-based programs often include a mix of running‚ cross-training‚ and rest days. A typical week might involve three running sessions: one speed or interval workout‚ one longer run for endurance‚ and one easy recovery run. Strength training or cross-training‚ such as cycling or swimming‚ can be incorporated to build overall fitness and prevent injuries. Rest days are crucial for recovery and should be prioritized. Coaches in Portland recommend using tools like the TrainingPeaks app to track progress and customize plans. Consistency is key‚ as gradual progression helps avoid burnout and injuries. Oregon’s scenic trails and road routes provide ideal settings for varied workouts. By following a balanced and structured plan‚ runners can confidently build endurance and speed‚ ensuring steady improvement leading up to race day.

Choosing the Right 5K Race in Oregon

Oregon offers a variety of 5K races‚ from road runs to trail events. Popular options include charity races like the Run for the Trees and the Oregon Brewery Running Series‚ supporting local causes. With scenic routes across Portland and beyond‚ runners can choose races that align with their interests and fitness goals‚ ensuring an enjoyable and rewarding experience.

Popular 5K Events in Portland and Surrounding Areas

Portland and its surrounding areas host a variety of exciting 5K events throughout the year‚ catering to runners of all levels. One of the most popular is the Oregon Brewery Running Series‚ which combines scenic runs with post-race festivities at local breweries. Another highlight is the Run for the Trees 5K‚ a virtual race organized by Oregon Parks Forever and the Bob Ross Company‚ aimed at planting trees in Oregon’s parks. The Heaven Can Wait 5K in Redmond is a beloved charity event supporting the breast cancer community‚ attracting over 1‚200 participants annually. These events not only offer a chance to stay active but also foster a sense of community and contribute to meaningful causes. Whether you’re a seasoned runner or a first-timer‚ Portland’s 5K scene provides endless opportunities to engage in fun and rewarding races.

Charity 5K Races for a Good Cause

Oregon’s 5K scene is enriched by numerous charity races that combine fitness with philanthropy. The Run for the Trees 5K‚ a virtual event‚ supports reforestation efforts in Oregon’s parks through Oregon Parks Forever and the Bob Ross Company. Another notable event is the Heaven Can Wait 5K in Redmond‚ which has raised significant funds for the breast cancer community‚ drawing over 1‚200 participants. These races not only promote health but also contribute to meaningful causes‚ fostering a sense of community and purpose among runners. Whether it’s supporting environmental initiatives or health-related charities‚ Oregon’s charity 5K races offer a rewarding way to give back while staying active. Participants can choose from a variety of causes‚ making each race a unique opportunity to make a difference.

Trail vs. Road 5K Races: Which is Right for You?

Oregon offers a diverse range of 5K races‚ from scenic trail runs to fast-paced road events. Trail races provide a unique challenge with varied terrain‚ such as dirt paths‚ hills‚ and technical sections‚ often surrounded by Oregon’s stunning natural beauty. These races are ideal for runners who enjoy adventure and connecting with nature. On the other hand‚ road races are typically flatter and faster‚ making them perfect for those focused on achieving a personal best time. Oregon’s road races often take place in urban areas like Portland‚ offering a lively atmosphere with cheering crowds. When choosing between trail and road‚ consider your preference for scenery‚ terrain‚ and pace. Both options provide rewarding experiences‚ allowing runners to explore Oregon’s diverse landscapes while staying active and competitive.

Community and Support for 5K Runners

Oregon’s running community offers strong support through local clubs‚ mentorship programs‚ and expert coaching. Runners of all levels find camaraderie and motivation‚ fostering a welcoming environment for 5K success.

Local Running Clubs and Their Benefits

Oregon is home to numerous local running clubs that cater to runners of all levels‚ from beginners to seasoned athletes. These clubs provide structured group workouts‚ expert coaching‚ and a supportive environment that fosters camaraderie and motivation. Many clubs‚ such as those in Portland‚ offer weekly coached training runs and pace groups tailored to individual goals. Joining a running club not only enhances accountability but also provides opportunities to learn from experienced runners and coaches. Additionally‚ these clubs often organize social events and races‚ creating a sense of community. The benefits extend beyond physical training‚ as members gain mental support‚ tips on proper form‚ and insights into local running routes. Whether you’re preparing for a 5K or seeking to improve your overall running experience‚ Oregon’s running clubs are an invaluable resource for growth and enjoyment. They truly embody the spirit of Oregon’s vibrant running culture.

Mentorship Programs for New Runners

Oregon offers excellent mentorship programs designed to guide new runners through their 5K journey. These programs typically pair experienced runners with newcomers‚ providing personalized advice and encouragement. Many clubs and training groups in Portland and beyond include mentorship as part of their structured 12-week training plans. Mentors often share tips on proper running form‚ injury prevention‚ and race-day strategies. Additionally‚ they help new runners stay motivated by setting achievable goals and celebrating progress. The supportive environment created by these mentorship programs helps build confidence and ensures that new runners feel prepared for their first race. With Oregon’s emphasis on community and camaraderie‚ mentorship programs play a key role in fostering a love for running that extends beyond the finish line. They are an essential resource for anyone looking to start their running journey in Oregon.

Expert Coaching and Guidance

Oregon provides access to expert coaching and guidance for 5K runners‚ ensuring personalized support for all skill levels. Certified coaches in Portland and beyond offer tailored training plans‚ focusing on technique‚ endurance‚ and race preparation. Many programs include weekly coached runs‚ email support‚ and actionable feedback to help runners improve. Virtual coaching options are also available‚ catering to remote runners who prefer flexible training. Coaches often use platforms like TrainingPeaks to create customized plans‚ track progress‚ and provide real-time adjustments. With a focus on injury prevention and performance optimization‚ expert guidance helps runners achieve their goals confidently. Whether you’re a beginner or aiming to improve your PR‚ Oregon’s coaching resources offer the expertise needed to succeed in your 5K journey‚ ensuring a well-rounded and effective training experience.

Additional Resources for 5K Success

Oregon offers resources like the TrainingPeaks app for customized plans‚ nutrition tips‚ and gear recommendations to enhance your 5K training. These tools provide a comprehensive approach to achieving your running goals effectively.

Training Peaks App for Customized Plans

The TrainingPeaks app offers tailored training plans for 5K runners in Oregon‚ providing structured workouts and tracking tools to monitor progress. Runners can choose from Beginner‚ Intermediate‚ or Advanced plans‚ designed to build endurance‚ speed‚ and stamina. The app allows users to set specific goals and receive personalized feedback‚ ensuring a focused approach to training. With features like customizable schedules and performance analytics‚ it helps runners stay motivated and accountable. Many Oregon-based training programs‚ such as those offered by local running clubs‚ integrate TrainingPeaks into their coaching services. This app is particularly popular among runners preparing for races like the Portland 5K series or charity events‚ as it offers a comprehensive platform to optimize performance. By leveraging TrainingPeaks‚ runners in Oregon can enhance their training experience and achieve their 5K goals more effectively.

Nutrition and Recovery Tips for Optimal Performance

Proper nutrition and recovery are essential for maximizing performance in 5K training. A balanced diet rich in complex carbs‚ lean proteins‚ and healthy fats fuels runs and aids recovery. Hydration is critical‚ with electrolytes replenishing lost salts during intense workouts. Post-run meals should include protein and carbs within 30 minutes to repair muscles and replenish energy stores. Incorporating anti-inflammatory foods like berries and nuts supports overall health. Recovery techniques such as stretching‚ foam rolling‚ and rest days prevent injuries and enhance adaptability. Prioritizing 7-9 hours of sleep nightly ensures the body repairs and adapts effectively. Oregon runners can also benefit from local resources‚ such as nutrition workshops and recovery clinics‚ to fine-tune their strategies. By combining consistent training with mindful nutrition and recovery practices‚ runners can optimize their performance and achieve their 5K goals effectively.

Gear and Equipment Recommendations

Having the right gear is crucial for a successful 5K experience in Oregon. Start with a good pair of running shoes designed for your foot type and running style‚ ensuring proper support and cushioning. Invest in moisture-wicking‚ breathable clothing to keep you dry and comfortable during runs. A supportive sports bra is essential for comfort and performance. Stay hydrated with a lightweight hydration belt or water bottle‚ especially for longer training sessions. Reflective gear enhances visibility during early morning or evening runs. Sunglasses and a hat protect you from the sun‚ while gloves can provide warmth in cooler weather. Consider a fitness tracker or smartwatch to monitor progress and stay motivated. Don’t forget high-quality socks to prevent blisters. Lastly‚ a lightweight rain jacket is practical for Oregon’s unpredictable weather. Visit local running stores for personalized gear recommendations tailored to your needs.