
Gin Rummy is a popular two-player card game played with a standard 52-card deck. The objective is to form valid sets and runs to score points.
History and Evolution of Gin Rummy
Gin Rummy, a variation of the Rummy family of card games, has a rich history dating back to the early 20th century. Created by Elwood T. Baker in 1909, it was designed to be a faster-paced alternative to traditional Rummy. The game gained popularity in the mid-1900s, becoming a favorite among card players in the United States. Its simplicity and quick gameplay made it accessible to all ages, solidifying its place as a classic. Over time, Gin Rummy evolved into one of the most widely recognized and played card games globally, with its rules and strategies refined to enhance competitive play. Today, it remains a beloved game, enjoyed both casually and in tournaments.
Basic Rules and Objectives of the Game
Gin Rummy is a two-player game using a standard 52-card deck. The goal is to score points by forming valid sets (three or four cards of the same rank) or runs (three or more consecutive cards of the same suit). Players take turns drawing and discarding cards, aiming to be the first to eliminate all their cards. The game ends when a player forms sets and runs that total all 10 cards in their hand, declaring “Gin.” Points are calculated based on the opponent’s unmelded cards, with bonuses awarded for achieving Gin or knocking. Strategy and skill are key to outperforming your opponent and securing victory.

Setup and Initial Play
Gin Rummy is played with a 52-card deck. Each player is dealt 10 cards, and the remaining cards form the draw pile. The top card is discarded, starting play. The youngest player begins first, alternating turns to draw and discard cards, aiming to form valid combinations quickly.
The Deck and Card Rankings
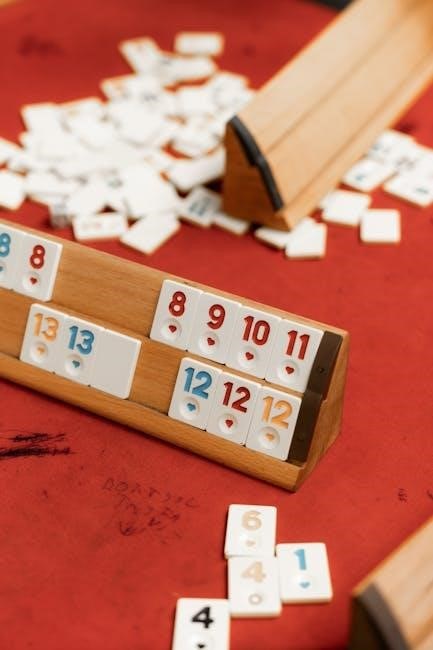
Gin Rummy is played with a standard 52-card deck, excluding jokers. The cards rank from highest to lowest as follows: King, Queen, Jack, 10, 9, 8, 7, 6, 5, 4, 3, 2, and Ace (lowest). Each suit contains 13 cards, and the deck is shuffled thoroughly before each game. Two decks are often used to speed up play, allowing one deck to be shuffled while the other is in use. The Ace is considered low and cannot act as a high card in a run. Face cards (King, Queen, Jack) are worth 10 points each, while numbered cards are worth their face value; This ranking system is crucial for forming valid combinations and calculating scores.
Dealing the Cards
In Gin Rummy, the game begins with a standard 52-card deck. The dealer shuffles the deck and deals 10 cards face-down to each player. The remaining cards are placed face-down in a pile, with the top card turned face-up to start the discard pile. Players must not reveal their cards during the deal. The dealer alternates between hands, and the player to the left of the dealer goes first. The dealing process ensures fairness and randomness, setting the stage for strategic gameplay. Each player’s 10-card hand is the foundation for forming sets and runs to outplay their opponent.

Initial Setup and Gameplay Overview
After dealing, the remaining cards form the draw pile, with the top card turned over as the discard pile’s base. Players alternate turns, drawing a card from the draw pile or picking up the top discard. Each player’s goal is to form sets (three or four cards of the same rank) or runs (three or more sequential cards of the same suit). The game progresses with players drawing and discarding cards strategically. The first player to form sets or runs with all their cards declares “Gin,” winning the round. If a player cannot form valid combinations, they knock, ending the round, and points are scored based on unmelded cards.

Scoring and Winning the Game
Points are scored based on opponents’ unmelded cards. Going Gin awards a 25-point bonus. The first player to reach 100 points wins the game.
How Points Are Calculated
In Gin Rummy, points are calculated based on the value of unmelded cards in a player’s hand at the end of a round. Each card has a specific point value: face cards (King, Queen, Jack) are worth 10 points each, Aces are 1 point, and numbered cards are worth their face value. When a player goes “Gin” or “Knocks,” they score points equal to the total value of their opponent’s unmelded cards. Additionally, a 25-point bonus is awarded for going Gin. If a player wins the game without the opponent scoring any points, they receive a 200-point bonus, otherwise, the winner gets a 100-point bonus. Points are capped at a maximum of 100 per hand.
Winning Conditions and Bonuses
A player wins the game by reaching an agreed-upon score, typically 100 points or more. The game ends when a player forms valid melds with all cards in their hand, achieving “Gin” for a 25-point bonus. If a player “Knocks” (lays down melds and discards one card), they score points based on unmatched cards. The winner receives a 100-point bonus if they win the game. If a player wins before their opponent scores, a 200-point bonus is awarded. Bonuses enhance the winner’s score, making strategic play crucial. Proper scoring ensures fair competition and adheres to Gin Rummy’s rules.

Strategies and Tips
Mastering Gin Rummy requires strategic play, focusing on forming sets and runs quickly. Prioritize discarding unwanted cards and timing your “Knock” or “Gin” for maximum points and bonuses.
Forming Valid Combinations (Sets and Runs)
In Gin Rummy, valid combinations are essential for scoring. A set consists of three or four cards of the same rank, while a run is three or more consecutive cards of the same suit. Players must strategically draw and discard cards to complete these combinations quickly. The game emphasizes forming sets and runs efficiently to outplay opponents. Understanding when to hold onto cards for potential combinations or discard them to prevent opponents from forming their own is crucial. Proper planning and card management are key to mastering these combinations and securing a win.
Knocking and Going Gin
Knocking in Gin Rummy occurs when a player forms valid combinations (sets or runs) that total all 10 or fewer unmatched cards. This action ends the hand, and the player scores points based on the opponent’s unmatched cards. Going Gin is a special case of knocking where a player forms combinations using all 10 cards in their hand. This awards a 20-point bonus in addition to the opponent’s unmatched card points. Knocking is strategic, as it allows players to score points, while going gin demonstrates a perfect hand. Proper timing and decision-making are crucial to maximize scoring potential and outplay opponents effectively.

Advanced Tactics to Outplay Opponents
Mastering advanced tactics in Gin Rummy requires a deep understanding of card probabilities and strategic thinking. One key tactic is card counting, which involves tracking discarded cards to anticipate opponents’ potential moves. Players can also use holding onto high cards strategically, as these are less likely to be matched by opponents. Additionally, forcing a “Gin” by holding back essential cards can disrupt opponents’ plans. Another tactic is misleading opponents by discarding cards that appear unimportant, concealing your own melds. Employing these strategies effectively can significantly improve your chances of winning and outsmarting your opponent in competitive games. Balancing risk and reward is essential for long-term success.
Variations of Gin Rummy

Variations of Gin Rummy
Oklahoma Gin introduces a twist by barring players from knocking unless their unmatched cards total 10 points or less. Other regional variants offer unique rule modifications.

Three-Player Gin Rummy
Three-Player Gin Rummy adapts the classic two-player game for three participants, often using two decks to ensure sufficient cards. Each player receives 7 cards, and the remaining cards form the draw pile. The dealer rotates each round to ensure fairness. The objective remains the same: form valid sets and runs to score points. However, knocking rules may vary slightly, as only one player can knock per round. This variation introduces a dynamic social element, with players needing to strategize against multiple opponents. While less common than the two-player version, three-player Gin Rummy offers a fresh challenge for those familiar with the original game.
Oklahoma Gin and Other Regional Variants
Oklahoma Gin is a notable regional variant of Gin Rummy, featuring unique rules that set it apart from the standard game. In Oklahoma Gin, the value of the upcard determines the minimum number of points a player must have to knock, adding a strategic layer. Other regional variants include differences in scoring systems, deck sizes, and special wild cards. These variations often reflect local gaming cultures and preferences, offering diverse experiences for players. While the core objective remains the same, regional twists keep the game fresh and exciting for enthusiasts exploring different styles of Gin Rummy.
Resources for Learning
Find official rules for Gin Rummy PDF guides online, offering detailed instructions and strategies. Websites like luudoo.com provide comprehensive downloadable resources for beginners and experts.
Recommended Books and Guides
For mastering Gin Rummy, several books and guides are highly recommended. “The Penguin Book of Card Games” by David Parlett offers a detailed overview of Rummy variations, including Gin Rummy. Another excellent resource is “Gin Rummy: A Comprehensive Guide” by Todd W. Neller, which provides strategies and rules for both beginners and advanced players. Additionally, “Winning Gin Rummy” by Frank Webster focuses on improving your gameplay with practical tips. These books are available in print and digital formats, including downloadable PDFs, making them accessible for learners. They cover everything from basic rules to advanced tactics, ensuring a well-rounded understanding of the game.
Online Tutorials and Practice Platforms
Enhance your Gin Rummy skills with online tutorials and practice platforms. Websites like CardGameHeaven and GinRummy.com offer step-by-step guides and interactive lessons. Platforms such as YouTube feature video tutorials, while CardGames.io provides free online games to practice. Apps like Gin Rummy Plus and RummyCircle allow you to play against AI or real opponents. These resources are ideal for mastering strategies, learning new tactics, and improving your gameplay. Many platforms also offer downloadable PDF guides and rulebooks, ensuring you have all the information you need to excel at Gin Rummy.