Heat & Glo Remote Control Instructions: A Comprehensive Guide
Heat & Glo fireplaces offer cozy warmth‚ and mastering your remote unlocks full control! This guide provides detailed instructions for pairing‚ operation‚ and troubleshooting.
From RC100 series to IntelliFire Plus‚ we cover various models‚ ensuring a seamless experience with your gas fireplace and its remote functionalities.
Successfully resetting your remote or addressing pairing issues is now easier than ever‚ thanks to our comprehensive‚ step-by-step instructions and helpful videos.
Understanding Your Heat & Glo Remote
Heat & Glo remotes are designed for intuitive control of your gas fireplace‚ offering convenience and precise adjustments to create the perfect ambiance. Familiarizing yourself with the remote’s layout and functions is the first step towards maximizing your fireplace experience;
Different models‚ such as the RC100/200/300 series and the RC6000TRX-IPI‚ feature varying button configurations‚ but core functionalities like power‚ flame height‚ and temperature control remain consistent. The IntelliFire Plus remotes introduce advanced features and a more modern interface.
Understanding the receiver’s IR sensor location is crucial for optimal communication between the remote and the fireplace. Ensure a clear line of sight‚ free from obstructions‚ for reliable operation. Regularly checking battery installation and recognizing the two-beep confirmation during pairing are also essential aspects of remote understanding.
Proper comprehension of these elements will empower you to efficiently operate and troubleshoot your Heat & Glo fireplace remote.
Remote Control Models
Heat & Glo offers a diverse range of remote control models‚ each tailored to specific fireplace systems and user preferences. The popular RC100/200/300 series are known for their simplicity and reliability‚ providing essential functions like power‚ flame adjustment‚ and temperature settings. These remotes are frequently used and have readily available troubleshooting resources.
The RC6000TRX-IPI model represents a step up in features‚ often found with more advanced fireplace systems. It offers enhanced control and compatibility. IntelliFire Plus remotes represent the latest generation‚ boasting a modern design and sophisticated functionalities‚ including programmable settings and improved responsiveness.
Understanding which model you have is crucial for accessing the correct instructions and reset procedures. Identifying your remote allows for targeted troubleshooting and ensures you’re utilizing all available features. Each model has unique characteristics impacting operation and maintenance.
RC100/200/300 Series Remotes
The Heat & Glo RC100‚ RC200‚ and RC300 series remotes are widely used for their straightforward operation. These models typically feature basic controls: power on/off‚ flame height adjustment‚ and temperature control. A common issue is the need for a reset‚ easily achieved through a specific button combination – often involving the ‘fire’ and ‘temp’ buttons simultaneously.
Troubleshooting often involves checking battery installation and ensuring a clear line of sight to the fireplace’s IR receiver. If unresponsive‚ a reset is the first step. These remotes are known for occasional pairing issues‚ requiring a re-pairing process. Videos demonstrate this process clearly.
For RC300 specific troubleshooting‚ resources like Jetmaster VIC offer detailed guidance. Remember to consult your fireplace’s manual for model-specific instructions. Proper care‚ including battery replacement‚ extends the remote’s lifespan.
RC6000TRX-IPI Remote
The Heat & Glo RC6000TRX-IPI remote is a more advanced model‚ offering enhanced control over your gas fireplace. If this remote isn’t responding‚ despite new batteries and a correctly displayed thermostat‚ the primary suspect is often the receiver’s IR sensor. Carefully inspect the sensor for obstructions or damage.
Troubleshooting steps include verifying the receiver is powered on and within range. Pairing can sometimes fail‚ necessitating a re-pairing procedure. Ensure no other devices are interfering with the IR signal. A common fix involves checking for a clear line of sight between the remote and the fireplace.
Detailed instructions for this remote are available online‚ assisting with resetting and resolving signal issues. Remember to consult the official Heat & Glo documentation for specific guidance related to your fireplace model.
IntelliFire Plus Remote Controls
Heat & Glo IntelliFire Plus remote controls represent a sophisticated approach to fireplace management. These systems incorporate built-in safety features‚ and understanding how to reset the ignition system is crucial for optimal performance. Should you encounter issues‚ a system reset can often resolve unexpected behavior.
Troubleshooting often begins with verifying battery installation and ensuring a clear signal path to the receiver. These remotes offer precise temperature control and flame height adjustment‚ but occasional pairing failures can occur. The pairing process requires following the manufacturer’s instructions carefully.
Every IntelliFire Plus remote is designed with user-friendliness in mind‚ but consulting the official Heat & Glo documentation is recommended for detailed guidance and advanced features. Proper maintenance ensures longevity and reliable operation.

Initial Setup & Pairing
Successfully pairing your Heat & Glo remote is essential for control! Listen for the two-beep confirmation‚ verifying a secure connection to your fireplace system.
Pairing a New Remote
Establishing a connection between your Heat & Glo fireplace and a new remote control is a straightforward process‚ crucial for seamless operation. Begin by ensuring the fireplace is powered on. Typically‚ this involves accessing the receiver unit‚ often located near the fireplace’s control valve. Locate the ‘learn’ or ‘pair’ button on the receiver – its position varies by model‚ so consult your fireplace’s specific documentation if needed.
Press and hold this button until an indicator light begins to flash‚ signaling the receiver is in pairing mode. Simultaneously‚ on your remote‚ press and hold the power button or a designated pairing button (again‚ refer to your remote’s manual). Continue holding both buttons until you hear two distinct beeps emanating from the fireplace.
These two beeps are the vital confirmation that the remote has successfully paired with the fireplace’s receiver. If pairing fails‚ repeat the process‚ ensuring fresh batteries are installed in the remote and that there’s no significant interference nearby.

The Two-Beep Confirmation
The two-beep confirmation is the definitive signal indicating successful pairing between your Heat & Glo remote and fireplace receiver. Upon initiating the pairing process – holding the receiver’s ‘learn’ button and the remote’s power or pairing button – listen attentively for these audible cues. The fireplace will emit two distinct beeps‚ clearly signifying that the remote’s signal has been recognized and accepted by the receiver.
This auditory confirmation is paramount; without it‚ the remote will not control your fireplace. If you don’t hear the two beeps‚ the pairing process has not completed successfully. Repeat the pairing steps‚ verifying battery levels and minimizing potential interference.
Once you receive the two beeps‚ you can confidently operate your fireplace using the newly paired remote. This simple yet crucial confirmation ensures a reliable connection and optimal control over your Heat & Glo fireplace.

Checking Battery Installation
Proper battery installation is the foundational step for a functioning Heat & Glo remote. Begin by ensuring you’re using fresh batteries of the correct type – typically AA or AAA‚ as specified in your remote’s manual. Open the battery compartment‚ usually located on the remote’s back or side‚ and carefully insert the batteries‚ observing the correct polarity (+ and -) markings within the compartment.
A loose connection or incorrect polarity can prevent the remote from transmitting a signal. After installation‚ gently close the battery compartment‚ ensuring it’s securely latched. Even new batteries can sometimes be defective‚ so testing with a known-good set is advisable if issues persist.
Confirm the remote displays a signal or responds to button presses; if not‚ re-check the battery installation before proceeding to further troubleshooting steps.
Understanding the Receiver’s IR Sensor
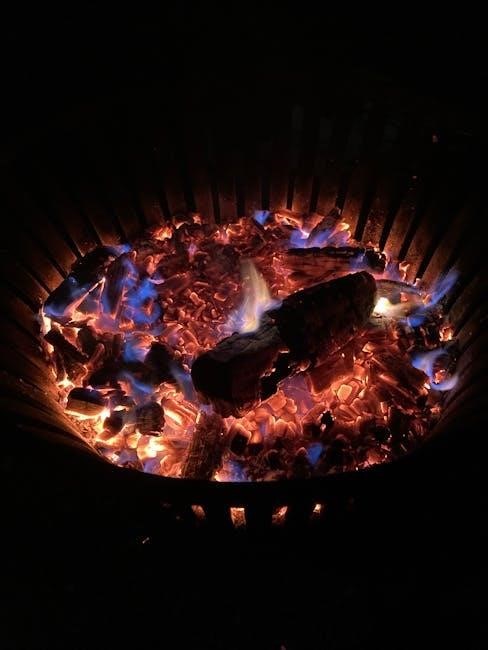
The receiver unit of your Heat & Glo fireplace relies on an infrared (IR) sensor to communicate with the remote. This sensor‚ typically a small‚ dark-colored component on the fireplace’s control module‚ must have a clear line of sight to the remote for signals to be received. Obstructions like decorative fireplace glass‚ logs‚ or even dust accumulation can interfere with the IR signal.
Ensure nothing blocks the sensor’s path. Regularly inspect the sensor for dust and gently clean it with a soft‚ dry cloth. If the 6000TRX-IPI remote isn’t working‚ the IR sensor is a prime suspect.
Testing the sensor’s functionality may involve pointing another IR device (like a TV remote) at it to see if it registers any signal‚ aiding in troubleshooting.
Basic Remote Functions
Heat & Glo remotes offer intuitive control! Easily power your fireplace on/off‚ adjust flame height‚ manage temperature settings‚ and regulate fan speed for optimal comfort.
Power On/Off Operation
Heat & Glo fireplaces are designed for convenient operation via your remote control. To power on your fireplace‚ simply press the power button on the remote – typically indicated by a universal power symbol. You should observe the fireplace igniting and the flames establishing themselves.
To power off‚ press the same power button again. The flames will gradually diminish‚ and the fireplace will enter standby mode. Ensure the remote has a clear line of sight to the fireplace receiver for reliable operation. If the fireplace doesn’t respond‚ check the batteries and ensure proper pairing (refer to the pairing section of this guide).
Some models feature a momentary power button‚ requiring a hold to turn off‚ while others offer a single press for both on and off functions. Familiarize yourself with your specific remote model’s behavior for seamless control.
Flame Height Adjustment
Adjusting the flame height on your Heat & Glo fireplace is easily accomplished using dedicated buttons on your remote control. Typically‚ these are marked with flame icons‚ often accompanied by “+” and “-” symbols for increasing or decreasing the flame intensity.
Pressing the “+” button will incrementally raise the flame height‚ providing more heat output and a visually fuller flame. Conversely‚ the “-” button lowers the flame‚ reducing heat and creating a more subtle ambiance. Some remotes offer a continuous press function for faster adjustment.
Experiment with different flame heights to find your preferred comfort level. Remember that higher flame settings consume more gas; Always ensure adequate ventilation when operating your fireplace at higher flame levels.
Temperature Control Settings
Your Heat & Glo remote allows precise temperature control for optimal comfort. Most models feature up and down arrow buttons to set your desired room temperature. The remote communicates this setting to the fireplace’s control system‚ which modulates the flame to maintain the selected temperature.
Many remotes display both the set temperature and the current room temperature. Some advanced systems offer programmable temperature schedules‚ allowing you to automatically adjust the heat throughout the day. Explore your remote’s menu options to discover these features.
Ensure the remote’s temperature display is set to Fahrenheit or Celsius‚ matching your preference. Consistent temperature control provides both comfort and energy efficiency.
Fan Speed Control
Heat & Glo remotes often include controls for the fireplace’s internal fan‚ enhancing heat distribution throughout the room. Typically‚ you’ll find buttons labeled “Fan‚” “Fan Speed‚” or similar‚ allowing you to adjust the airflow.
Many remotes offer multiple fan speed settings – Low‚ Medium‚ High‚ and Auto. The “Auto” setting intelligently adjusts fan speed based on the fireplace’s heat output‚ maintaining a consistent temperature. Experiment with different speeds to find the optimal balance between heat circulation and noise level.
Some models allow independent control of the fan‚ enabling you to circulate air even without the flame being active. This feature is useful for cooling during warmer months. Refer to your specific remote’s manual for detailed instructions.
Troubleshooting Common Issues
Heat & Glo remote problems are easily solved! This section addresses unresponsive remotes‚ signal loss‚ interference‚ and incorrect temperature displays‚ offering quick fixes.
Remote Not Responding
If your Heat & Glo remote isn’t responding‚ begin with the simplest solutions. First‚ ensure fresh batteries are correctly installed‚ verifying polarity. A weak signal is a common culprit. Next‚ confirm there’s a clear line of sight between the remote and the fireplace’s IR receiver – obstructions can block communication.
Check for potential interference from other electronic devices. Sometimes‚ other infrared signals can disrupt the connection. Try moving interfering devices away from the fireplace. If the issue persists‚ attempt a remote reset following the instructions for your specific model (RC100/200/300 or IntelliFire Plus).
Finally‚ inspect the remote’s buttons for any physical damage or stuck keys. A malfunctioning button can prevent operation. If none of these steps resolve the problem‚ further troubleshooting may be needed‚ potentially involving the receiver itself.
No Signal to Fireplace
Experiencing no signal to your Heat & Glo fireplace despite a functioning remote often points to issues with the receiver or pairing. First‚ re-pair the remote to the fireplace‚ carefully following the pairing procedure – listen for the confirming two beeps. Ensure the receiver’s IR sensor isn’t blocked by debris or obstructions.
Inspect the receiver itself for any visible damage. A faulty receiver may require professional repair or replacement. If pairing repeatedly fails‚ consider potential interference from other devices emitting infrared signals. Try temporarily disabling nearby electronics to rule out this possibility.
For RC6000TRX-IPI models‚ specifically check the receiver’s IR sensor. A thorough check of the receiver is crucial for restoring the connection and enjoying your fireplace’s warmth.
Interference Issues
Heat & Glo remotes utilize infrared (IR) technology‚ susceptible to interference from other devices. Common culprits include fluorescent lights‚ direct sunlight‚ and other IR-emitting electronics like televisions or sound systems. These can disrupt the signal between your remote and the fireplace receiver.
To diagnose interference‚ temporarily turn off or move potential sources. Test the remote’s functionality after each adjustment. If the signal improves‚ you’ve identified the interfering device. Consider relocating the fireplace receiver or shielding it from direct light sources.
Ensure there are no obstructions blocking the line of sight between the remote and the receiver. While less common‚ strong electromagnetic fields can also cause issues; maintaining distance from such sources is advisable.
Incorrect Temperature Display
An inaccurate temperature reading on your Heat & Glo remote can be frustrating; First‚ verify the remote’s batteries are fresh‚ as low power can cause erratic readings. Ensure the remote is properly paired with the fireplace receiver; a weak connection can lead to miscommunication.
Check for obstructions between the remote and the receiver‚ as signal interference can affect data transmission. If the issue persists‚ try resetting both the remote and the fireplace’s ignition system‚ following the manufacturer’s instructions.
Consider that ambient room temperature fluctuations can also influence the displayed value. If the problem continues after these steps‚ consult a qualified technician for further diagnosis and potential receiver calibration.
Resetting Your Remote Control
Resetting your Heat & Glo remote restores factory settings‚ resolving many issues. Specific procedures vary by model – RC100/200/300 and IntelliFire Plus have unique steps.
Safety features are integrated into the reset process‚ ensuring proper operation and preventing accidental ignition. Follow instructions carefully for optimal results.
Resetting RC100/200/300 Remotes
Resetting your Heat & Glo RC100‚ RC200‚ or RC300 remote is a straightforward process designed to resolve common operational issues. Begin by ensuring the fireplace is completely off. Then‚ locate the small reset button‚ typically found within the battery compartment of the remote itself.
Using a small‚ non-metallic object – like a pen tip or toothpick – gently press and hold the reset button for approximately five to ten seconds. You may not receive any visual or audible confirmation during this process. After releasing the button‚ replace the batteries with fresh ones‚ even if the existing batteries appear to have charge.
Next‚ attempt to re-pair the remote with your fireplace receiver‚ following the pairing instructions outlined in your owner’s manual. Successful pairing is usually indicated by two audible beeps from the fireplace unit. If the remote still fails to function correctly after these steps‚ consult the troubleshooting section or contact Heat & Glo customer support.
Resetting IntelliFire Plus Ignition System
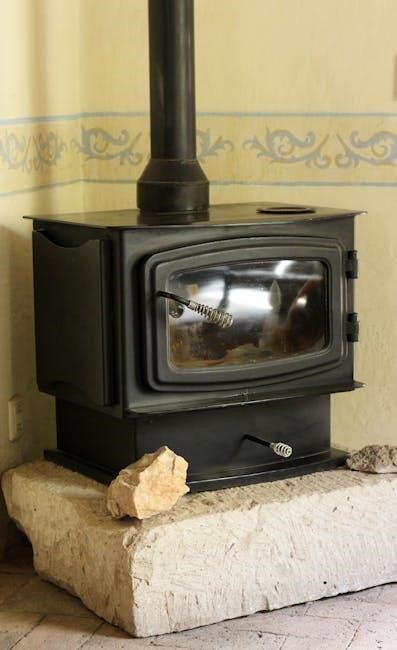
The IntelliFire Plus ignition system incorporates safety features requiring a specific reset procedure. If experiencing ignition problems‚ begin by completely shutting off gas supply to the fireplace – a crucial safety step. Locate the IntelliFire Plus control module‚ typically housed behind the fireplace’s glass front.
On the control module‚ you’ll find a small reset button. Press and hold this button for a full thirty seconds. This action clears the system’s memory and initiates a self-diagnostic check. After releasing the button‚ restore the gas supply and attempt to reignite the fireplace using your remote.
Every Heat & Glo remote includes built-in safety features‚ and this reset addresses potential lockouts. If the issue persists‚ verify proper remote pairing and battery installation. Consult your owner’s manual or Heat & Glo support for further troubleshooting assistance.
Safety Features & Resetting
Heat & Glo fireplaces prioritize safety‚ integrating features like automatic shut-off systems and overheat protection. These systems can sometimes trigger a lockout‚ requiring a reset. Before attempting any reset procedure‚ ensure the area around the fireplace is well-ventilated and free of flammable materials.
The resetting process varies depending on your remote model. RC series remotes have a dedicated reset button‚ while IntelliFire Plus systems utilize a control module reset. Always refer to your owner’s manual for specific instructions tailored to your fireplace.
Understanding these safety mechanisms and resetting procedures empowers you to maintain a safe and enjoyable fireplace experience. If you encounter persistent issues or are uncomfortable performing a reset‚ contact a qualified technician for assistance and further troubleshooting.

Advanced Troubleshooting
Heat & Glo remote issues demand deeper diagnostics! Explore IR sensor problems‚ RC300 specifics‚ pairing failures‚ and deciphering error codes for optimal fireplace control.
Diagnosing IR Sensor Problems
Heat & Glo fireplaces rely on a clear infrared (IR) signal between the remote and the receiver unit. If your remote isn’t responding‚ the IR sensor could be the culprit. Begin by ensuring nothing obstructs the line of sight – remove any décor or objects positioned between the remote and the fireplace’s receiver.
Next‚ carefully inspect the receiver’s IR sensor for dust or debris; gently clean it with a soft‚ dry cloth. A weak battery in either the remote or the receiver can also diminish the IR signal strength‚ so ensure fresh batteries are installed in both units.
Test the remote’s IR output using a digital camera or smartphone camera – you should see a flickering light when a button is pressed. If no light is visible‚ the remote itself may be faulty. Finally‚ consider potential interference from other electronic devices emitting IR signals.
Troubleshooting RC300 Remotes
The Heat & Glo RC300 remote‚ while versatile‚ can sometimes present unique challenges. If it’s unresponsive‚ begin with the basics: verify fresh batteries and ensure a clear line of sight to the fireplace receiver. A common issue involves pairing failures; attempt the pairing process again‚ carefully observing the two-beep confirmation signal.
If pairing continues to fail‚ try resetting the RC300 remote following the manufacturer’s instructions – often involving a specific button combination. Check for interference from other devices‚ as the RC300 can be susceptible to signal disruption.
Consult online resources like Jetmaster’s website for detailed RC300 troubleshooting guides and videos. Pellethead also offers helpful RC300 remote troubleshooting advice. Remember to always prioritize safety when working with gas fireplaces.
Addressing Pairing Failures
Encountering difficulties pairing your Heat & Glo remote is a common frustration. First‚ confirm the receiver’s IR sensor isn’t obstructed and that the remote is within a reasonable range. Initiate the pairing process again‚ meticulously following the manufacturer’s instructions – listen closely for the crucial two-beep confirmation indicating success.
If pairing repeatedly fails‚ a remote reset might be necessary. Try resetting the ignition system as well‚ as this can sometimes resolve communication issues. Ensure no other infrared devices are interfering with the signal during pairing.
Review online resources and videos for model-specific guidance. A faulty receiver or remote could be the root cause‚ requiring professional assistance. Patience and methodical troubleshooting are key to establishing a reliable connection.
Understanding Error Codes
Heat & Glo fireplaces utilize error codes to diagnose operational issues‚ displayed on the remote or fireplace interface; These codes aren’t always explicitly detailed in the basic manual‚ necessitating a deeper dive into model-specific documentation or the manufacturer’s website.
Common codes often relate to flame sensor problems‚ gas supply interruptions‚ or communication failures between the remote and the ignition system. Documenting the exact code displayed is crucial when contacting customer support or a qualified technician.
Attempting to interpret and resolve error codes without proper knowledge can be risky. Referencing the official Heat & Glo resources ensures accurate diagnosis and safe repair procedures‚ preventing potential damage or hazards.

Maintenance & Care
Heat & Glo remotes require minimal upkeep! Regularly replace batteries‚ gently clean the device‚ and protect it from drops or excessive moisture for longevity.
Battery Replacement Guidelines
Heat & Glo remotes typically utilize AA or AAA batteries‚ though specific requirements vary by model. Always use fresh‚ high-quality alkaline batteries for optimal performance and longevity. Avoid mixing old and new batteries‚ or different battery types‚ as this can cause damage or malfunction.
When replacing batteries‚ ensure correct polarity – match the positive (+) and negative (-) terminals as indicated within the battery compartment. If the remote has been unused for an extended period‚ or exhibits weak signal strength‚ battery replacement is the first troubleshooting step. Dispose of used batteries responsibly‚ following local regulations for recycling or proper disposal.
Regularly checking battery levels‚ especially during peak heating seasons‚ will prevent unexpected interruptions to your fireplace control. Consider keeping a spare set of batteries readily available for quick replacement.
Cleaning Your Remote
Maintaining a clean Heat & Glo remote ensures reliable operation and extends its lifespan. Regularly wipe the remote’s exterior with a soft‚ dry cloth to remove dust‚ fingerprints‚ and grime. For stubborn marks‚ lightly dampen the cloth with water‚ but avoid excessive moisture.
Never use abrasive cleaners‚ solvents‚ or harsh chemicals‚ as these can damage the remote’s surface or internal components. Pay particular attention to cleaning around the buttons and display screen‚ ensuring no debris obstructs their function. Compressed air can be used to gently remove dust from hard-to-reach areas.
Always power off the remote and remove the batteries before cleaning. Allow the remote to dry completely before reinserting the batteries and resuming use.
Protecting the Remote from Damage
To safeguard your Heat & Glo remote‚ avoid dropping it or subjecting it to physical shock. Store the remote in a safe‚ dry location away from extreme temperatures and direct sunlight. Consider using a protective case or pouch to shield it from scratches and impacts.
Keep the remote away from liquids‚ as moisture can cause internal corrosion and malfunction. Avoid placing heavy objects on top of the remote‚ as this can damage the buttons or display. Regularly inspect the battery compartment for signs of corrosion and clean if necessary.
Proper handling and storage will significantly prolong the life of your remote‚ ensuring continued reliable control of your fireplace.